
Nginx virtual hosts will enable you to host multiple websites on your server. All websites will share the same IP address. This can be done by making a unique virtual host file on your Nginx webserver for each domain.
- a. Adjust DNS Records For Your Domain (1 step)
- b. Obtain SSL Certificate (7 steps)
- c. Manage Nginx Virtual Hosts Directories (sites-available and sites-enabled) (5 steps)
a. Adjust DNS Records For Your Domain
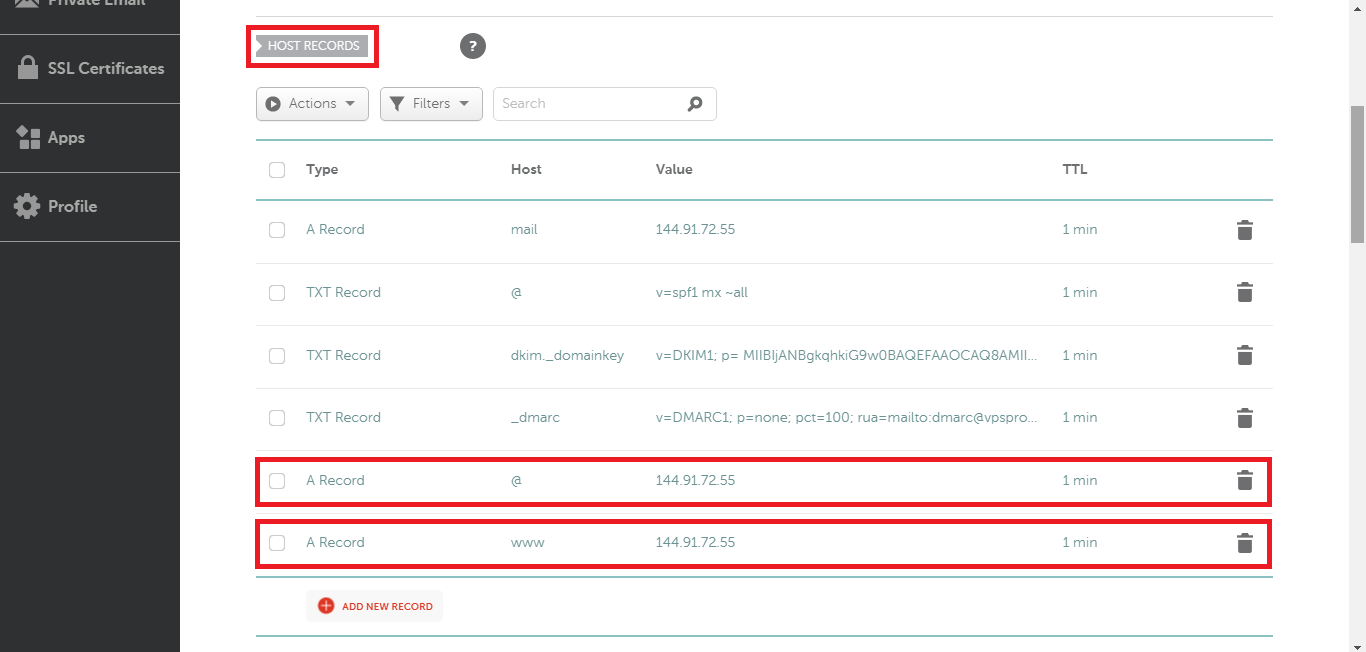
1. Before we go through the configuration of Nginx virtual hosts, we should adjust the DNS Settings. So, go to your DNS settings in your domain registrar panel. Then, create an A Record for your domain that you would like to host on your server as below. Note that we will use the domain: gainbybrain.com as an example. You can use the same domain that’s connected to the email server (vpsprof.com) as we connected only the mail subdomain (mail.vpsprof.com). In other words, vpsprof.com is free to point to your WordPress website on the same server.
| DNS Record Type | Host | Content, Value or the Answer | TTL (Time To Live) |
|---|---|---|---|
| A | @ | 144.91.72.55 | 1 min (or the minimum allowed) |
| DNS Record Type | Host | Content, Value or the Answer | TTL (Time To Live) |
|---|---|---|---|
| A | www | 144.91.72.55 | 1 min (or the minimum allowed) |
We already explained how to configure DNS records here: DNS Settings (Add A Record part). Your two A records should be like the two A records below. Note that the @ sign refers to the domain format: https://gainbybrain.com while the www refers to the domain format: www.gainbybrain.com. In this article, any request that comes with or without https and with or without www, will be directed to https://gainbybrain.com (or https://vpsprof.com if you use vpsprof.com instead of gainbybrain.com).
Your DNS records should look like below:
b. Obtain SSL Certificate
1. Install the software-properties-common if not installed, by running the below command on PuTTY SSH client or any Linux terminal:
root@mail:~# apt install software-properties-common2. Update your repository by running the following command:
root@mail:~# apt update3. Install the Certbot by running the following command:
root@mail:~# apt install certbot python3-certbot-nginx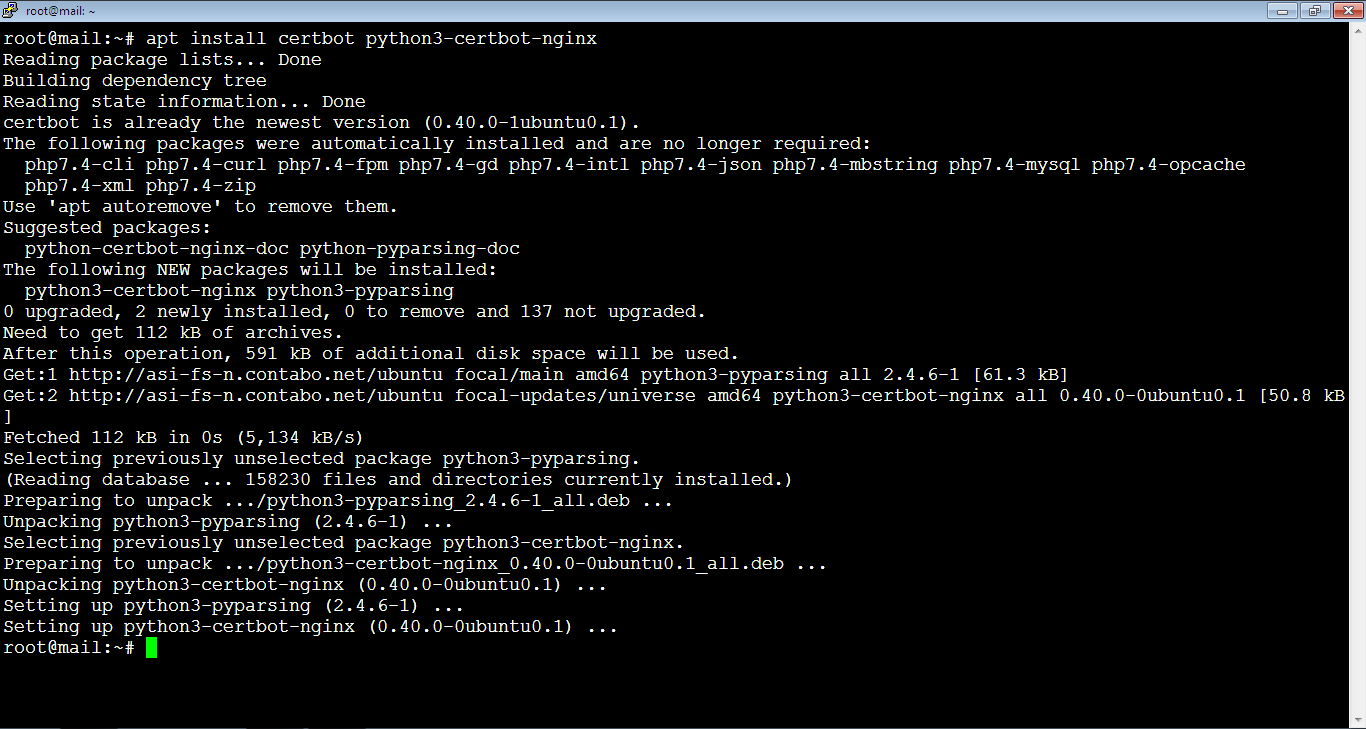
Sometimes, you get a prompt to confirm the installation by typing: y, or: Y.
4. Request the SSL certificate by running the below command:
root@mail:~# certbot --nginx certonly -d gainbybrain.comIf you don’t want the traffic on https://www.gainbybrain.com to be redirected to https://gainbybrain.com, include www in the certificate request as below:
root@mail:~# certbot --nginx certonly -d gainbybrain.com -d www.gainbybrain.com
Enter your email address then hit Enter key.
5. You will be asked to agree on terms if you use Letsencrypt for the first time.
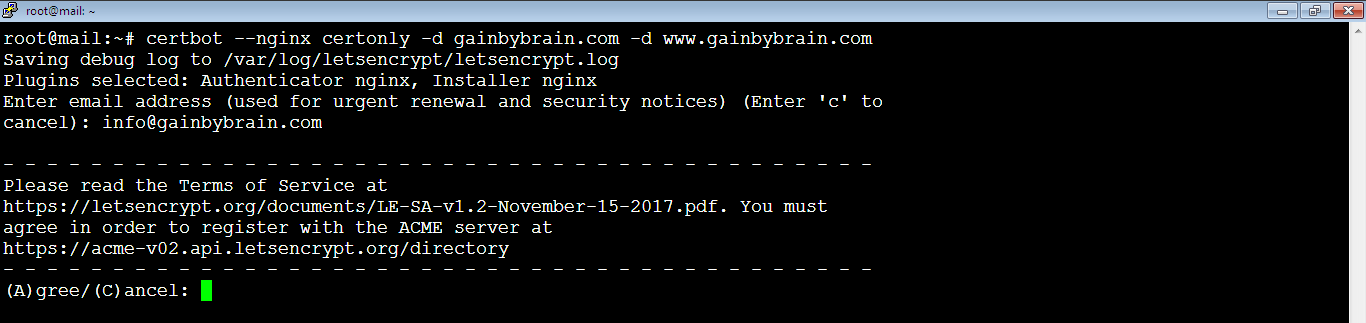
Type: A, or: a, then hit Enter key.
6. You will be asked if you would like to share your email.
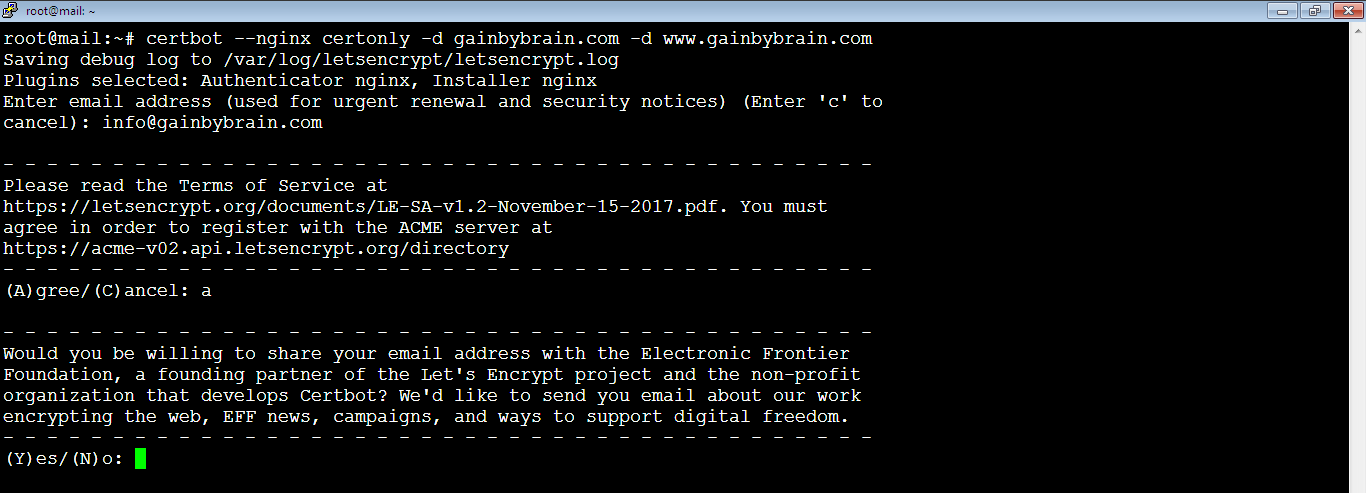
We will choose no, so type: N, or: n, then hit Enter key.
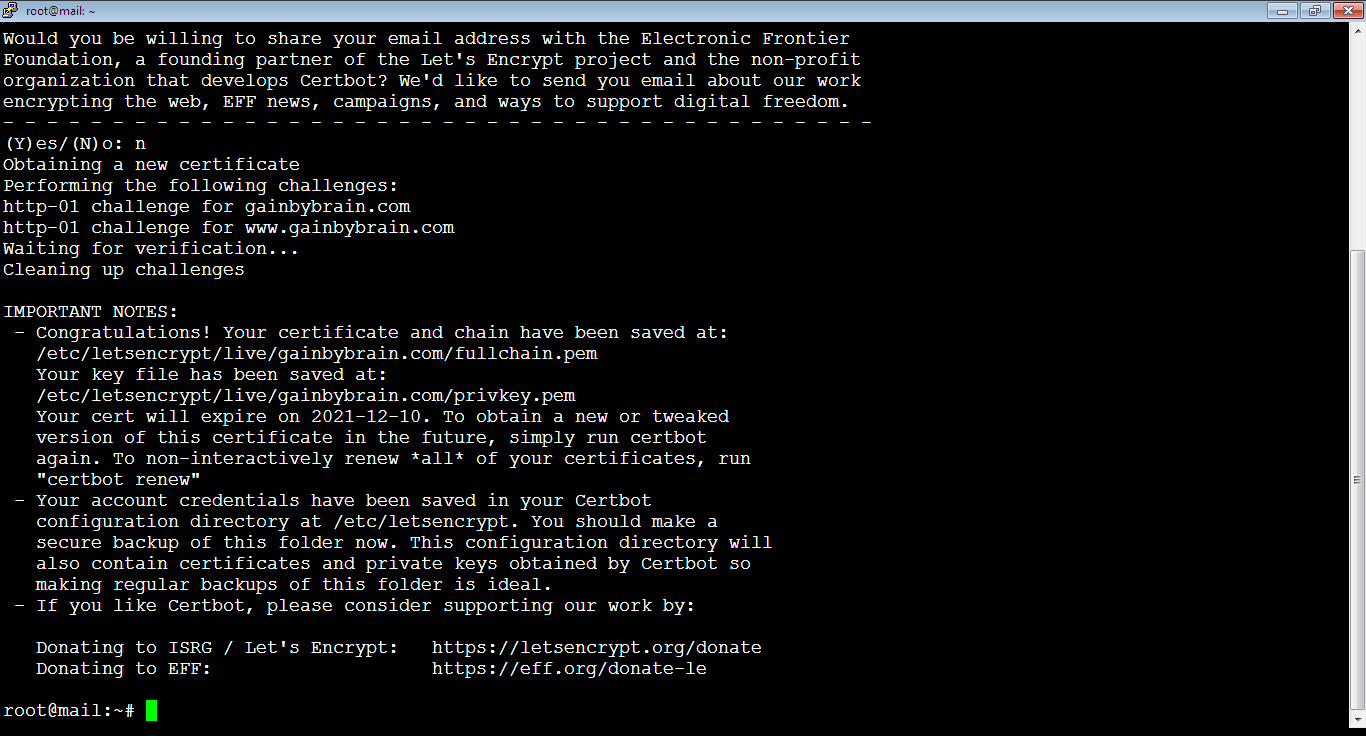
And here we go, you should see a congratulations! notice which means that the certificate has been installed successfully 🙂
7. Reboot Nginx server to take the effect of the changes by running the command:
root@mail:~# service nginx reloadIf Nginx configuration is OK but it doesn’t reboot for no reason, you can reboot the whole server, it should fix the problem.
d. Manage Nginx Virtual Hosts Directories (sites-available and sites-enabled)
1. We will create a sites-available file then load it with server directives code. But, we’ve two cases related to the existence of iRedMail on your server, each case is different because iRedMail comes with built-in configurations that we should use.
First Case: If iRedMail is Installed
Run the below command to open a virtual host file for your domain. For example, we will make virtual host for the domain: gainbybrain.com. Note that the file has .conf extension which is used to define the virtual host files.
root@mail:~# nano /etc/nginx/sites-available/gainbybrain.com.confThen, add the below lines inside the file. Note that you need to replace the domain (gainbybrain.com) in bold in the file with your own domain and the directory (sitebase) with your own directory name in case you haven’t updated the website on the golden box on top.
# HTTP
server {

    server_name gainbybrain.com www.gainbybrain.com;

    # Redirect http://www.site to https://site
    if ($host = www.gainbybrain.com) {
        return 301 https://$host$request_uri;
    }

    # Redirect http://site to https://site
    if ($host = gainbybrain.com) {
        return 301 https://$host$request_uri;
    }

    # Redirect all insecure http:// requests to https://
    return 301 https://$host$request_uri;
}

# HTTPS
server {

    # ipv4 with http2

    ## For Nginx version < 1.25.1
    listen 443 ssl http2;

    ## For Nginx version >= 1.25.1
    #listen 443 ssl;
    #http2 on;

    # ipv6 with http2
    #listen [::]:443 ssl http2;

    # SSL Certificate
    ssl_certificate /etc/letsencrypt/live/gainbybrain.com/fullchain.pem;
    ssl_certificate_key /etc/letsencrypt/live/gainbybrain.com/privkey.pem;
    include /etc/letsencrypt/options-ssl-nginx.conf;
    ssl_dhparam /etc/letsencrypt/ssl-dhparams.pem;

    # Website URL and Directory
    server_name gainbybrain.com www.gainbybrain.com;
    root /var/www/html/sitebase;
    index index.php index.html;

    ## Below are iRedMail included
    #include /etc/nginx/templates/misc.tmpl;
    #include /etc/nginx/templates/ssl.tmpl;
    #include /etc/nginx/templates/iredadmin.tmpl;
    #include /etc/nginx/templates/roundcube.tmpl;
    #include /etc/nginx/templates/sogo.tmpl;
    #include /etc/nginx/templates/netdata.tmpl;

    # Connect Nginx to PHP
    include /etc/nginx/templates/php-catchall.tmpl;

    #include /etc/nginx/templates/stub_status.tmpl;

    # Don't allow pages to be rendered in an iframe on external domains.
    add_header X-Frame-Options "SAMEORIGIN";

    # MIME sniffing prevention
    add_header X-Content-Type-Options "nosniff";

    # Enable cross-site scripting filter in supported browsers.
    add_header X-Xss-Protection "1; mode=block";

    # Prevent access to hidden files
    location ~* /\.(?!well-known\/) {
        deny all;
    }

    # Prevent access to certain file extensions
    location ~\.(ini|log|conf)$ {
        deny all;
    }

    # Enable WordPress Permanent Links
    # If we don’t add the below, website directories will get 404 error (like: site/admin or  site/sample-page)
    location / {
        try_files $uri $uri/ /index.php?$args;
    }
}
Second Case: If iRedMail is Not Installed
Open a virtual host file for your domain. Replace the domain: gainbybrain.com with your own domain.
root@iRedMail-doesnt-exist:~# nano /etc/nginx/sites-available/gainbybrain.com.confIf you already installed PHP, Nginx and MariaDB separately by following the articles: Install PHP on Ubuntu, Install Nginx on Ubutu and Install MariaDB on Ubuntu, add the below lines inside the file. Note that you need to replace the domain (gainbybrain.com) in bold in the file with your own domain and the directory (sitebase) with your own directory name in case you haven’t updated the website on the golden box on top.
# HTTP
server {

    server_name gainbybrain.com www.gainbybrain.com;

    # Redirect http://www.site to https://site
    if ($host = www.gainbybrain.com) {
        return 301 https://$host$request_uri;
    }

    # Redirect http://site to https://site
    if ($host = gainbybrain.com) {
        return 301 https://$host$request_uri;
    }

    # Redirect all insecure http:// requests to https://
    return 301 https://$host$request_uri;
}

# HTTPS
server {

    # ipv4 with http2

    ## For Nginx version < 1.25.1
    listen 443 ssl http2;

    ## For Nginx version >= 1.25.1
    #listen 443 ssl;
    #http2 on;

    # ipv6 with http2
    #listen [::]:443 ssl http2;

    # SSL Certificate
    ssl_certificate /etc/letsencrypt/live/gainbybrain.com/fullchain.pem;
    ssl_certificate_key /etc/letsencrypt/live/gainbybrain.com/privkey.pem;
    include /etc/letsencrypt/options-ssl-nginx.conf;
    ssl_dhparam /etc/letsencrypt/ssl-dhparams.pem;

    # Website URL and Directory
    server_name gainbybrain.com www.gainbybrain.com;
    root /var/www/html/sitebase;
    index index.php index.html;

    # Connect Nginx to PHP
    location ~ \.php$ {
        fastcgi_pass    unix:/run/php/php7.4-fpm.sock;
        fastcgi_param   SCRIPT_FILENAME $document_root$fastcgi_script_name;
        include         fastcgi_params;
    }

    # Don't allow pages to be rendered in an iframe on external domains.
    add_header X-Frame-Options "SAMEORIGIN";

    # MIME sniffing prevention
    add_header X-Content-Type-Options "nosniff";
    # Enable cross-site scripting filter in supported browsers.
    add_header X-Xss-Protection "1; mode=block";

    # Prevent access to hidden files
    location ~* /\.(?!well-known\/) {
        deny all;
    }

    # Prevent access to certain file extensions
    location ~\.(ini|log|conf)$ {
        deny all;
    }

    # Enable WordPress Permanent Links
    # If we don’t add the below, website directories will get 404 error (like: site/admin or  site/sample-page)
    location / {
        try_files $uri $uri/ /index.php?$args;
    }
}
2. Make symbolic link between the virtual host in sites-available directory and sites-enabled directory by running the command. After running this command, the file will be copied to sites-enabled directory and linked at the same time.
root@mail:~# ln -s /etc/nginx/sites-available/gainbybrain.com.conf /etc/nginx/sites-enabledIf you want to disable any website, just delete its virtual hosts file from the sites-enabled directory. If you want to enable it, then make a symbolic link again by running the command above.

3. Let’s make sure that Nginx has no problems by running the below command:
root@mail:~# nginx -t4. In case no errors appear, restart Nginx by running the command for the changes to take effect.
root@mail:~# service nginx restartIn case you got Nginx warning like below:
nginx: [warn] the "listen ... http2" directive is deprecated, use the "http2" directive instead in /etc/nginx/sites-enabled/gainbybrain.com.conf:24It happens because for Nginx versions >= 1.25.1, the format changed. The old format is like this:
listen 443 ssl http2;And the new format is like below:
listen 443 ssl;
http2  on;
You can find your Nginx version by running the command:
root@mail:~# nginx -vGZIP Compression
You can enable GZIP compressoin on your website by adding the below code to HTTPS server block at the end of the file gainbybrain.com.conf
    ## https://kinsta.com/blog/enable-gzip-compression/
    # enables GZIP compression
    gzip on;

    # compression level (1-9)
    # 6 is a good compromise between CPU usage and file size
    gzip_comp_level 6;

    # minimum file size limit in bytes to avoid negative compression outcomes
    gzip_min_length 256;

    # compress data for clients connecting via proxies
    gzip_proxied any;

    # directs proxies to cache both the regular and GZIP versions of an asset
    gzip_vary on;

    # disables GZIP compression for ancient browsers that don't support it
    gzip_disable "msie6";

    # compress outputs labeled with the following file extensions or MIME-types
    # text/html MIME-type is enabled by default and need not be included
    gzip_types
    application/atom+xml
    application/geo+json
    application/javascript
    application/x-javascript
    application/json
    application/ld+json
    application/manifest+json
    application/rdf+xml
    application/rss+xml
    application/vnd.ms-fontobject
    application/wasm
    application/x-web-app-manifest+json
    application/xhtml+xml
    application/xml
    font/eot
    font/otf
    font/ttf
    image/bmp
    image/svg+xml
    text/cache-manifest
    text/calendar
    text/css
    text/javascript
    text/markdown
    text/plain
    text/xml
    text/vcard
    text/vnd.rim.location.xloc
    text/vtt
    text/x-component
    text/x-cross-domain-policy;
If you want to copy a large portion of text from a file (like the gzip code above) while using PuTTY, it’s better to run cat command instead of copying the code from nano file because when you highlight the text with the mouse and try to scroll down, it won’t go down but it works with cat command:
root@mail:~# cat /etc/nginx/sites-available/gainbybrain.com.conf5. Now, let’s test by visiting the website: https://gainbybrain.com, you need to visit your own domain.
If iRedMail is not installed and you already installed PHP, Nginx and MariaDB separately by following the articles: Install PHP on Ubuntu, Install Nginx on Ubutu and Install MariaDB on Ubuntu, you may get the error below:
Your PHP installation appears to be missing the MySQL extension which is required by WordPress.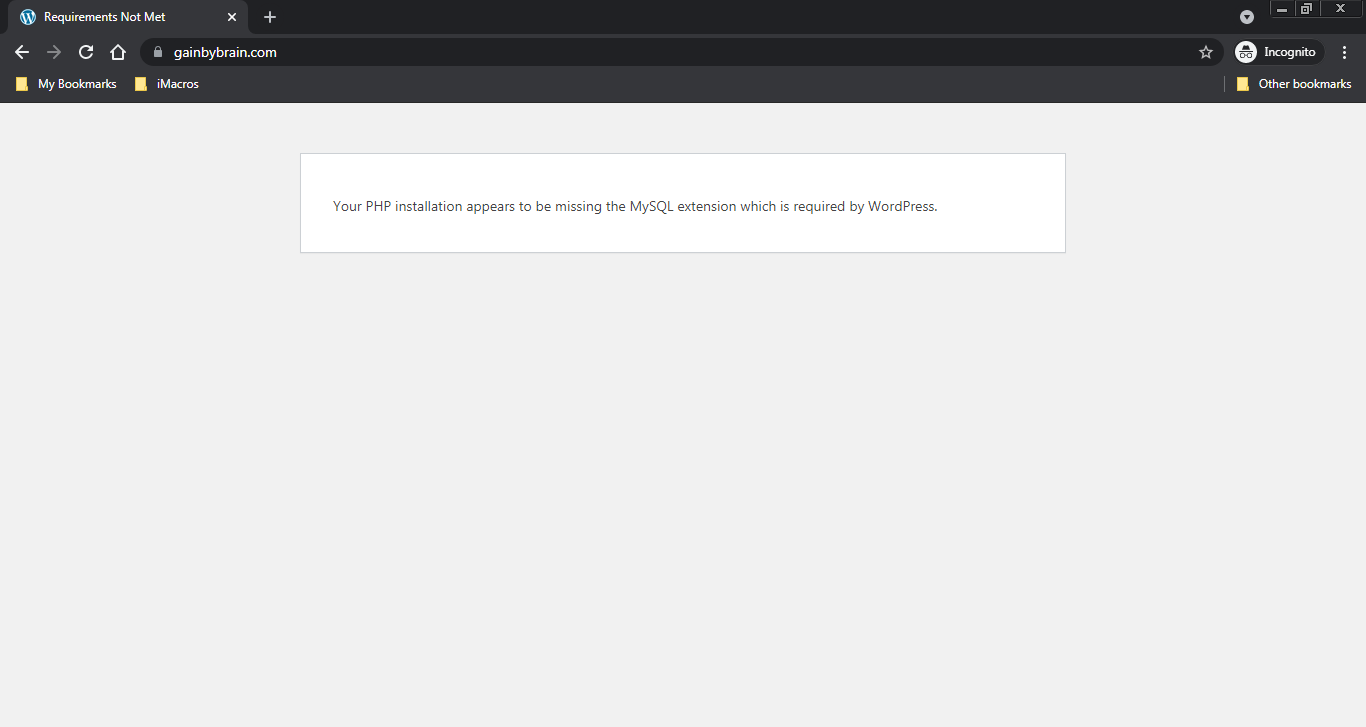
But don’t worry, the solution is very easy! Just install MySQL extension by running the below command:
root@iRedMail-doesnt-exist:~# apt install php7.4-mysqlDon’t forget to enable the APT repository for the PHP before running the command above:
root@iRedMail-doesnt-exist:~# add-apt-repository ppa:ondrej/phpAnd once you finish, disable it to avoid upgrading PHP version automatically when running apt-upgrage:
root@iRedMail-doesnt-exist:~# add-apt-repository ppa:ondrej/php --remove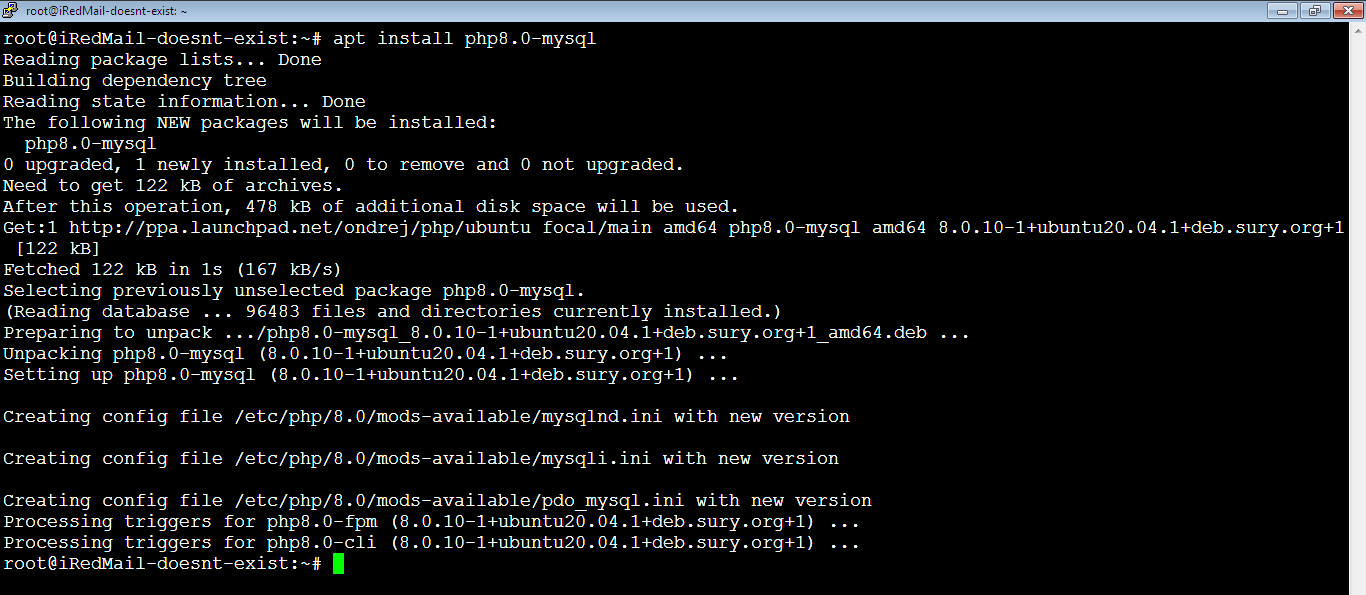
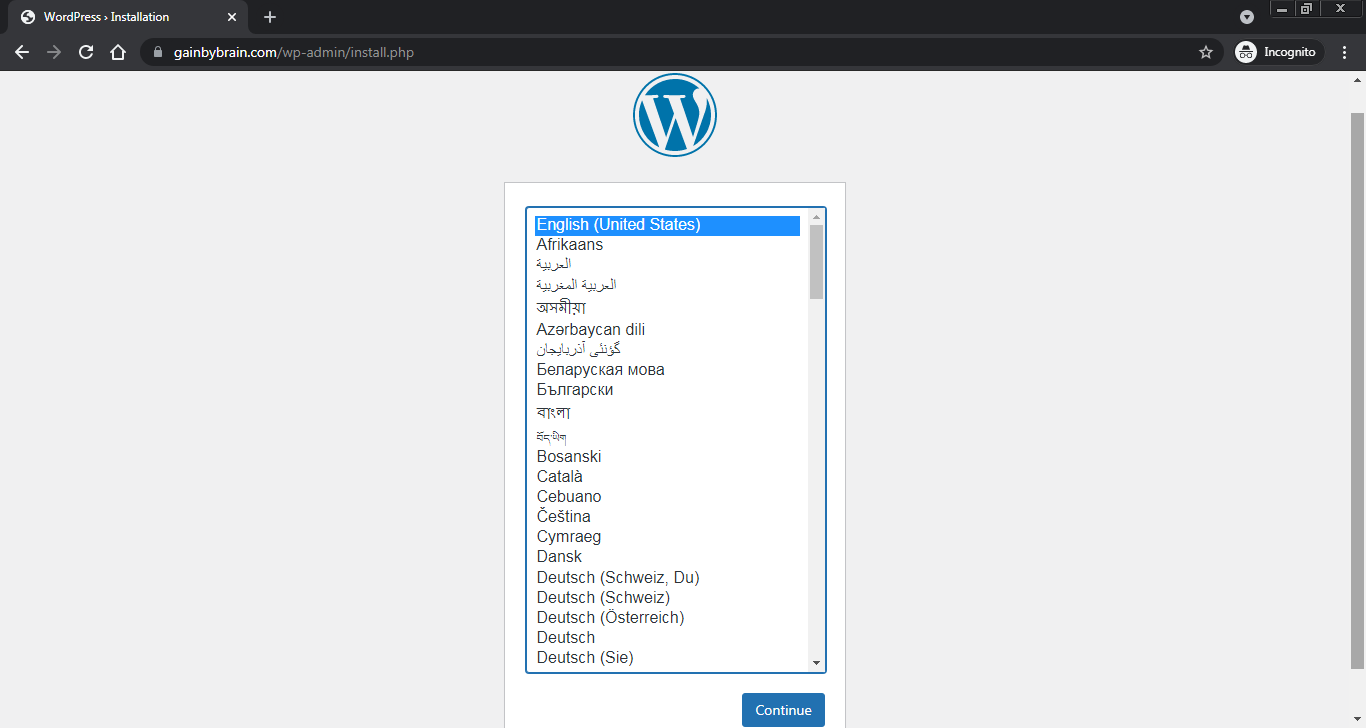
You don’t need to restart Nginx server. Now test the WordPress, it works! You can start the installation now.
If you need to enable the HTML format for the WooCommerce transnational emails, you should install the php-xml module by running the command:
root@iRedMail-doesnt-exist:~# apt install php8.0-xmlIf the php-xml module is not installed on your server, the WooCommerce Email type in the WooCommere Settings (Emails) will show only “Plain text” option like this:
Email type -> Plain text.
Once you install the php-xml module, you will see:
Email type -> Plain text, HTML, Mutipart