Do you believe that you can get a VPS with 8 GB RAM & 200 GB SSD storage for only €4.99 monthly?
Also, VPSs Come With Full Virtualization, 100% Fast SSD, Quick Provisioning & Excellent/Quick Customer Service. We advise everybody to rent VPS with high specs to run all the services flawlessly.
Top Cost-Effective Plans to Rent VPS, Select Your Plan:
VPS S SSD
€4.99
/ month
4 vCPU Cores
8 GB RAM
200 GB SSD
200 Mbit/s Port
1 Snapshot
VPS M SSD
€8.99
/ month
6 vCPU Cores
16 GB RAM
400 GB SSD
400 Mbit/s Port
2 Snapshots
VPS L SSD
€14.99
/ month
8 vCPU Cores
30 GB RAM
800 GB SSD
600 Mbit/s Port
3 Snapshots
VPS XL SSD
€26.99
/ month
10 vCPU Cores
60 GB RAM
1600 GB SSD
1 Gbit/s Port
4 Snapshots
We are using the €4.99 Monthly Plan (first plan above) for our email service besides all the websites hosted. We’re hosting many email domains, many email addresses, as well as many websites on a single server for only €4.99 per month! In case you want higher specs, you can order a VPS with higher specs; it would be great too!
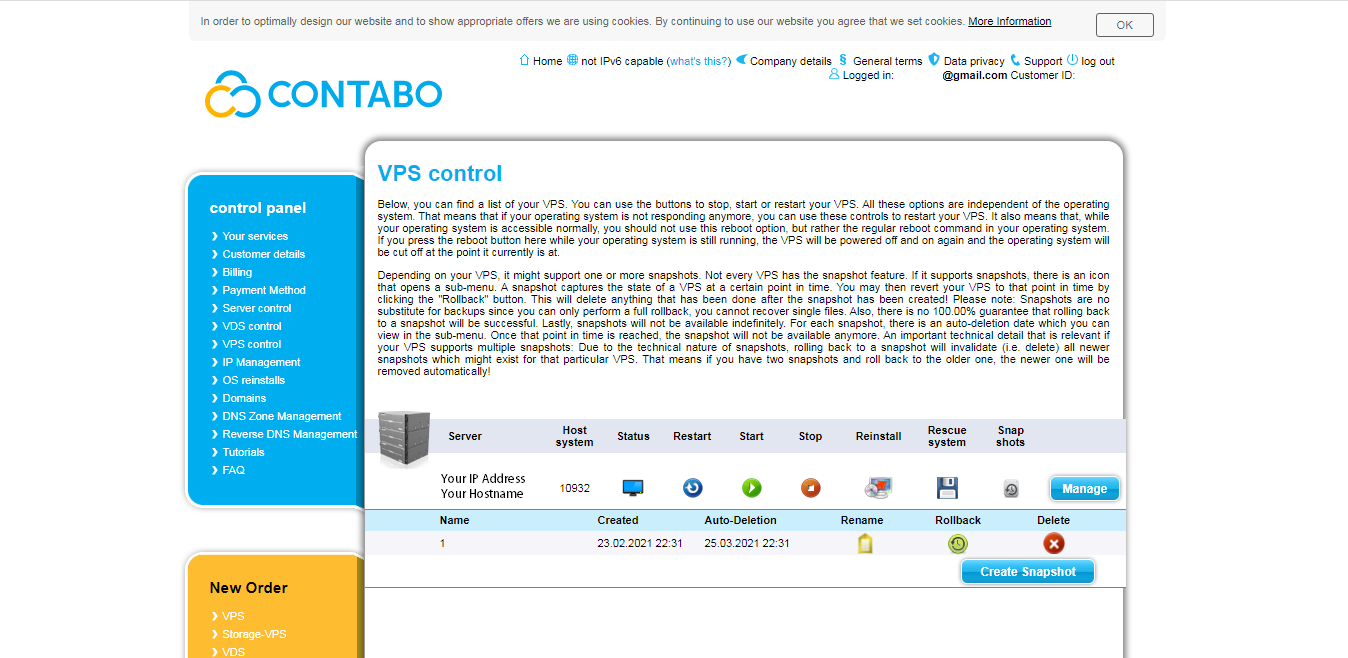
On the other hand, servers are very fast and powerful, with 99.99% uptime. It comes with a free snapshot, but it gets deleted every month, so you need to take a new one every month. In addition, the panel is so straightforward & easy.
Let’s Rent VPS Step by Step
There are many plans to rent a VPS server, but you can go for the suitable one for your needs.
Plan and Currency selection
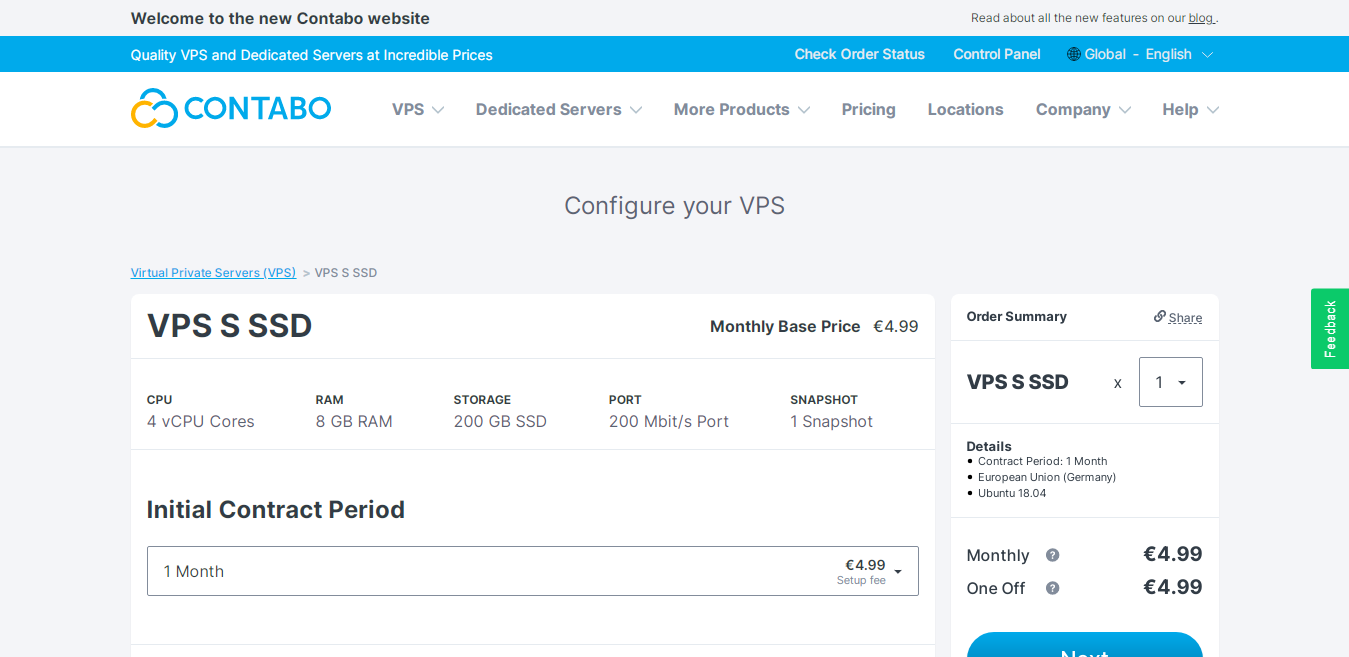
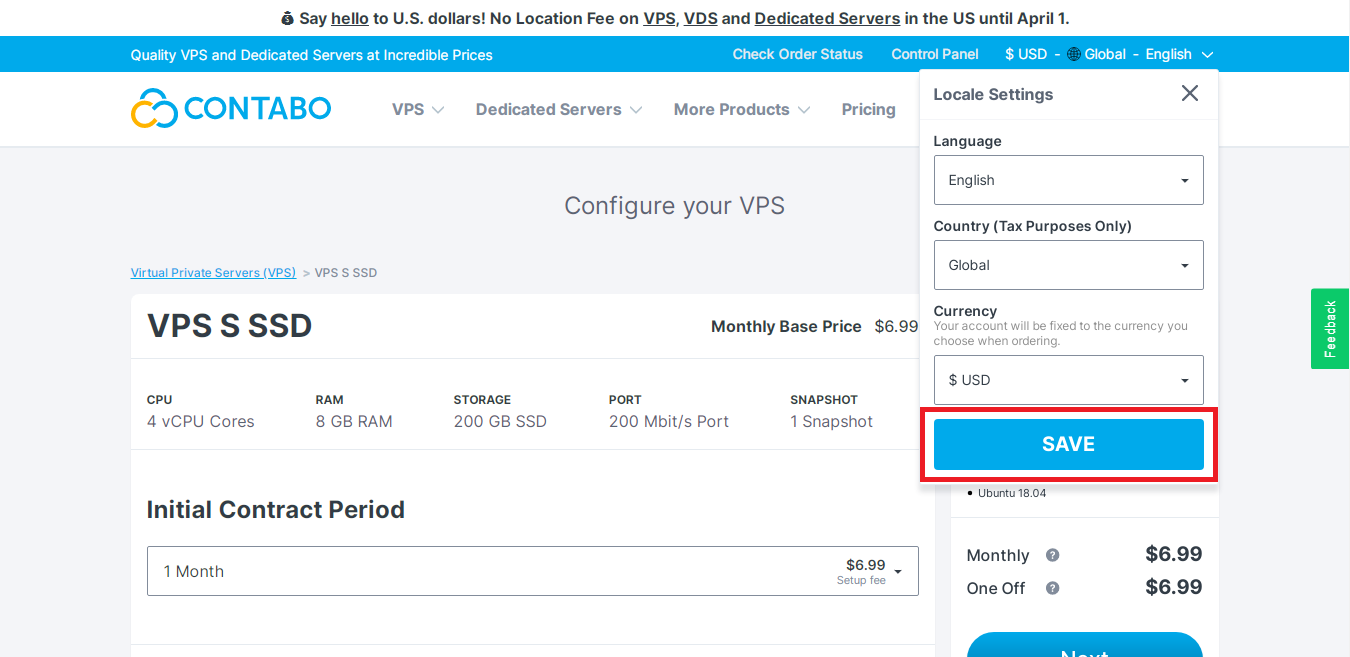
1. Choose one of the plans above. We will go for the €4.99 plan as an example. You will be directed to the plan page as follows. Note that his plan comes with incredible specs:
- 4 vCPU Cores
- 8 GB RAM
- 200 GB SSD Storage
- 200 Mbit/s Port
- 1 Free Snapshot
2. If you want to change the currency, click on the language/country/currency menu, then switch to the currency you want. Also, you can change the country and the language.
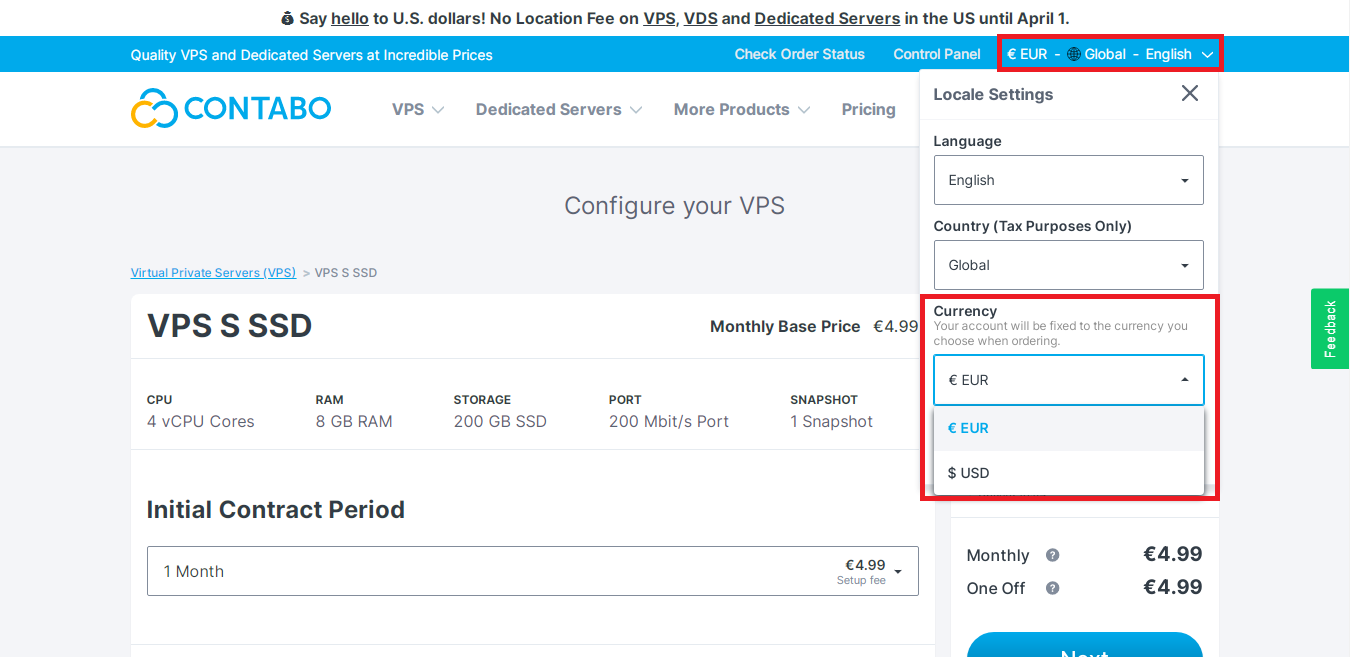
3. After that, click on Save to save the changes you made.
Contract, Region, Image, and IP Selection
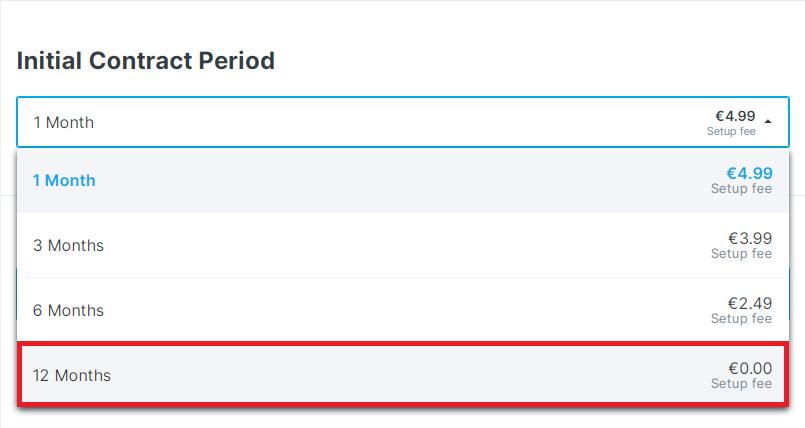
4. Select the Initial Contract Period. The setup fee is free if you go for 12 months.
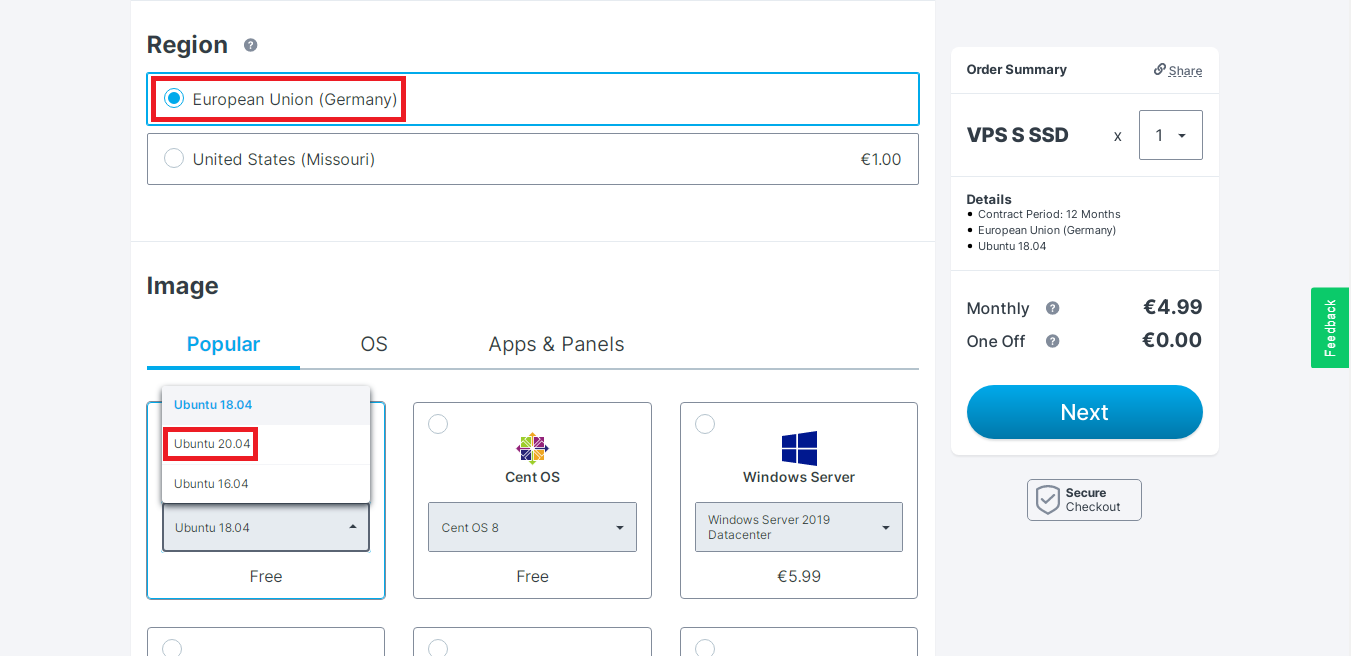
5. Then, select the Region you want and the Image of the Linux. We tested European Union (Germany), and it works like a charm. We never had any problem besides it’s free. For the Image of the Linux, in our guides, we will work on Ubuntu 20.04 LTS because it’s so easy, solid, comes with long-term support, and works flawlessly.
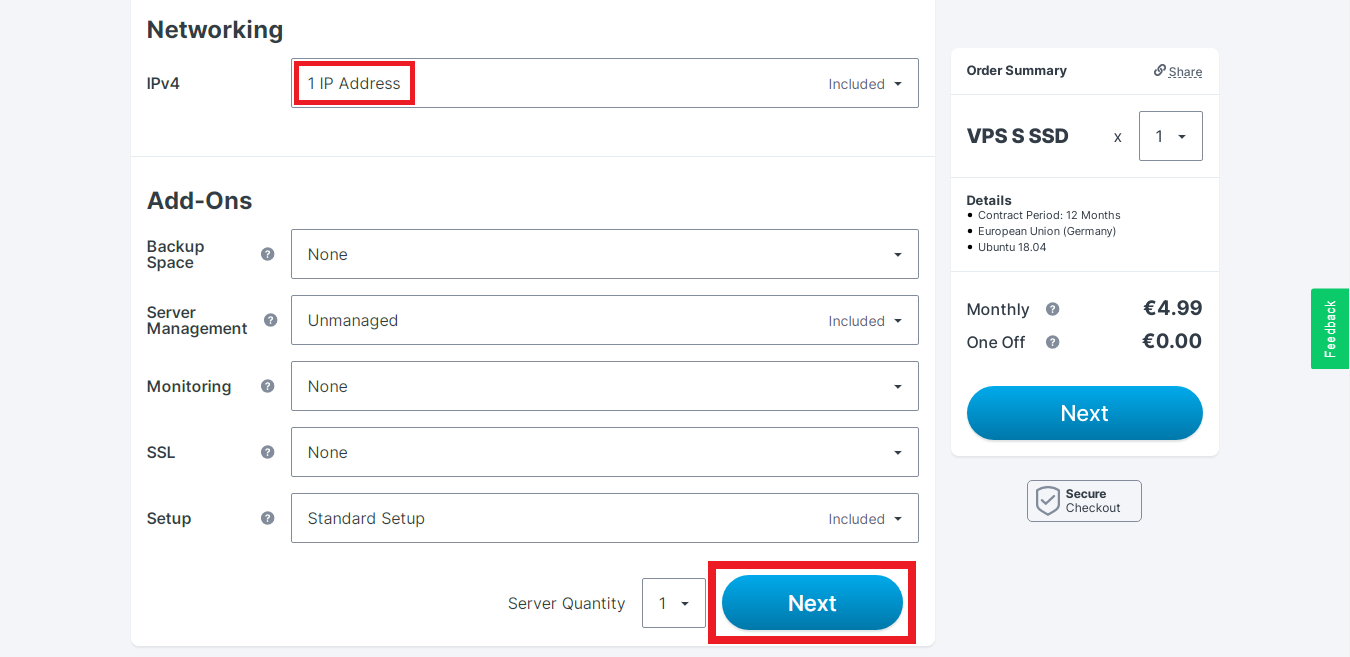
6. Select the number of IPv4 addresses you want to have on your server. You can start with one IP (default, included for free), and later if you need more, you can add. For the Add-Ons (below the IPv4 address), you can keep them as default because you will manage your server from A to Z and have your own configuration. When you’re done, click on Next.
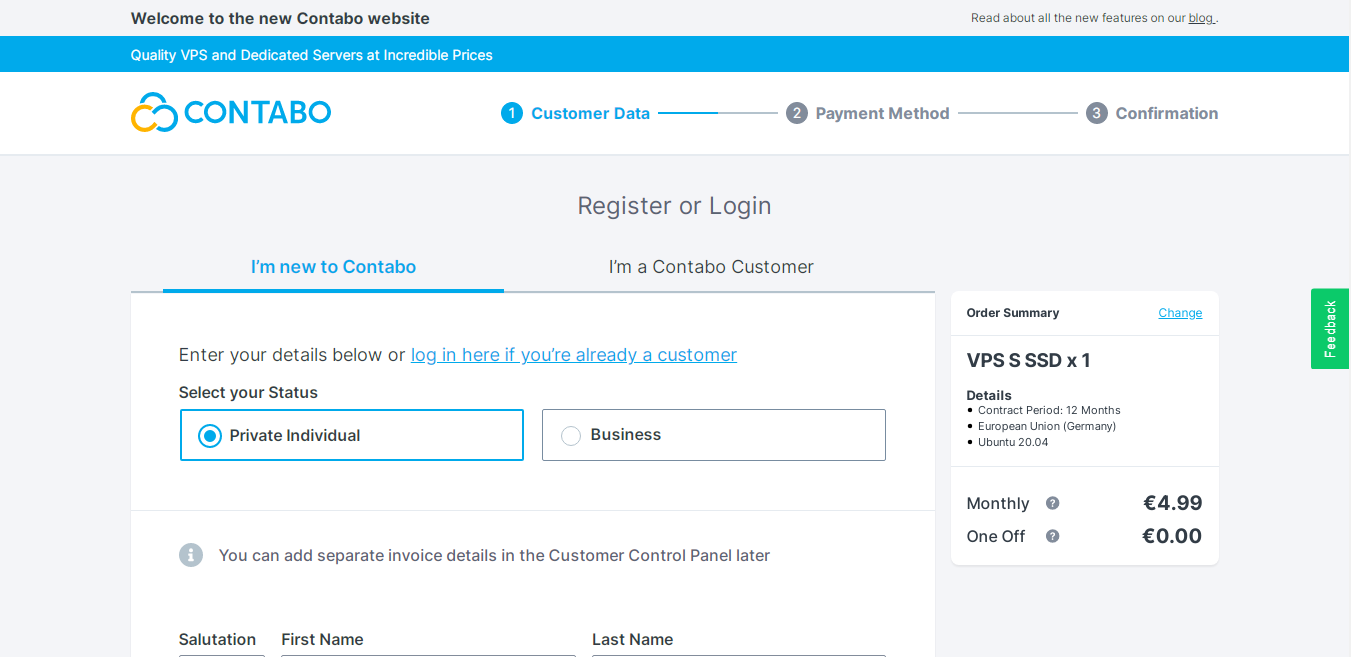
Login or Register to Rent VPS
7. You will be directed to the customer’s data page. If you’re new to Contabo, you need to register a new account. If you’re a customer already, you need to log in to your account. If you register a new account, once you’re done filling up your info, click on Next at the end of the page.
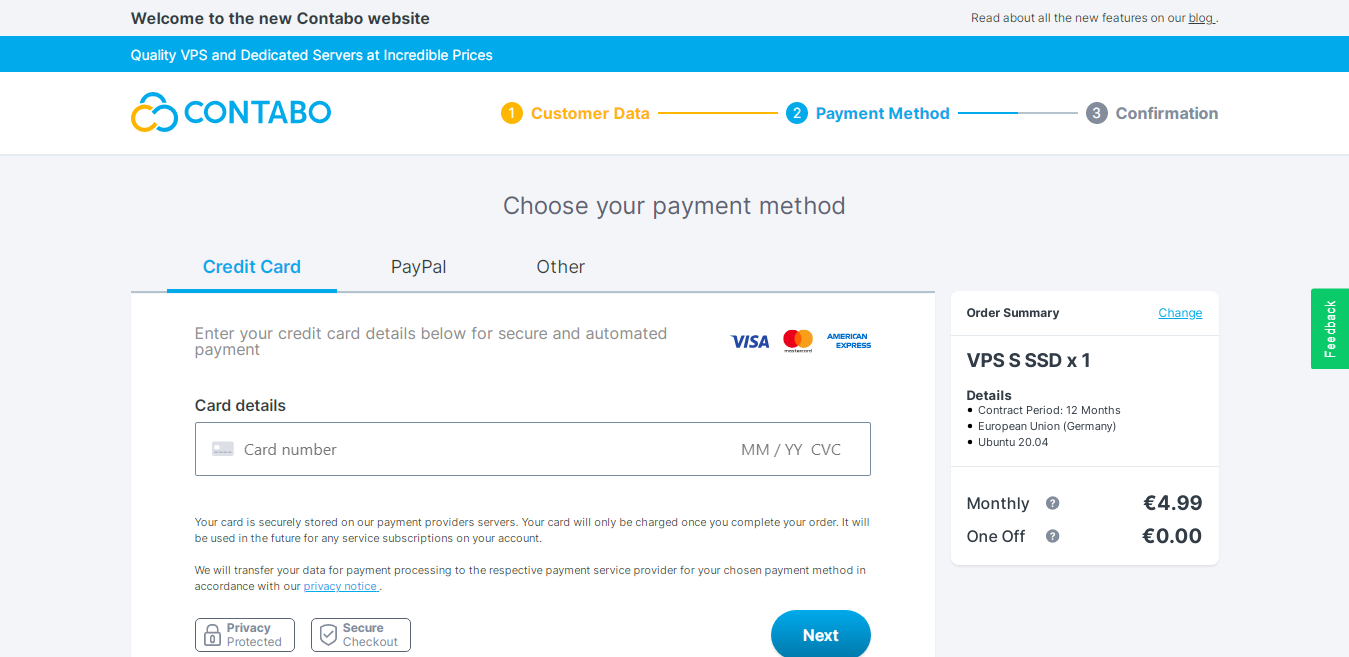
Payment
8. Once you register/log in, you will be directed to the payment method page. As you see, there are different payment methods. You can pay by Credit Card, PayPal, Skrill, or Bank Transfer. Choose the payment method you want and if there is required info, add them, then click on Next.
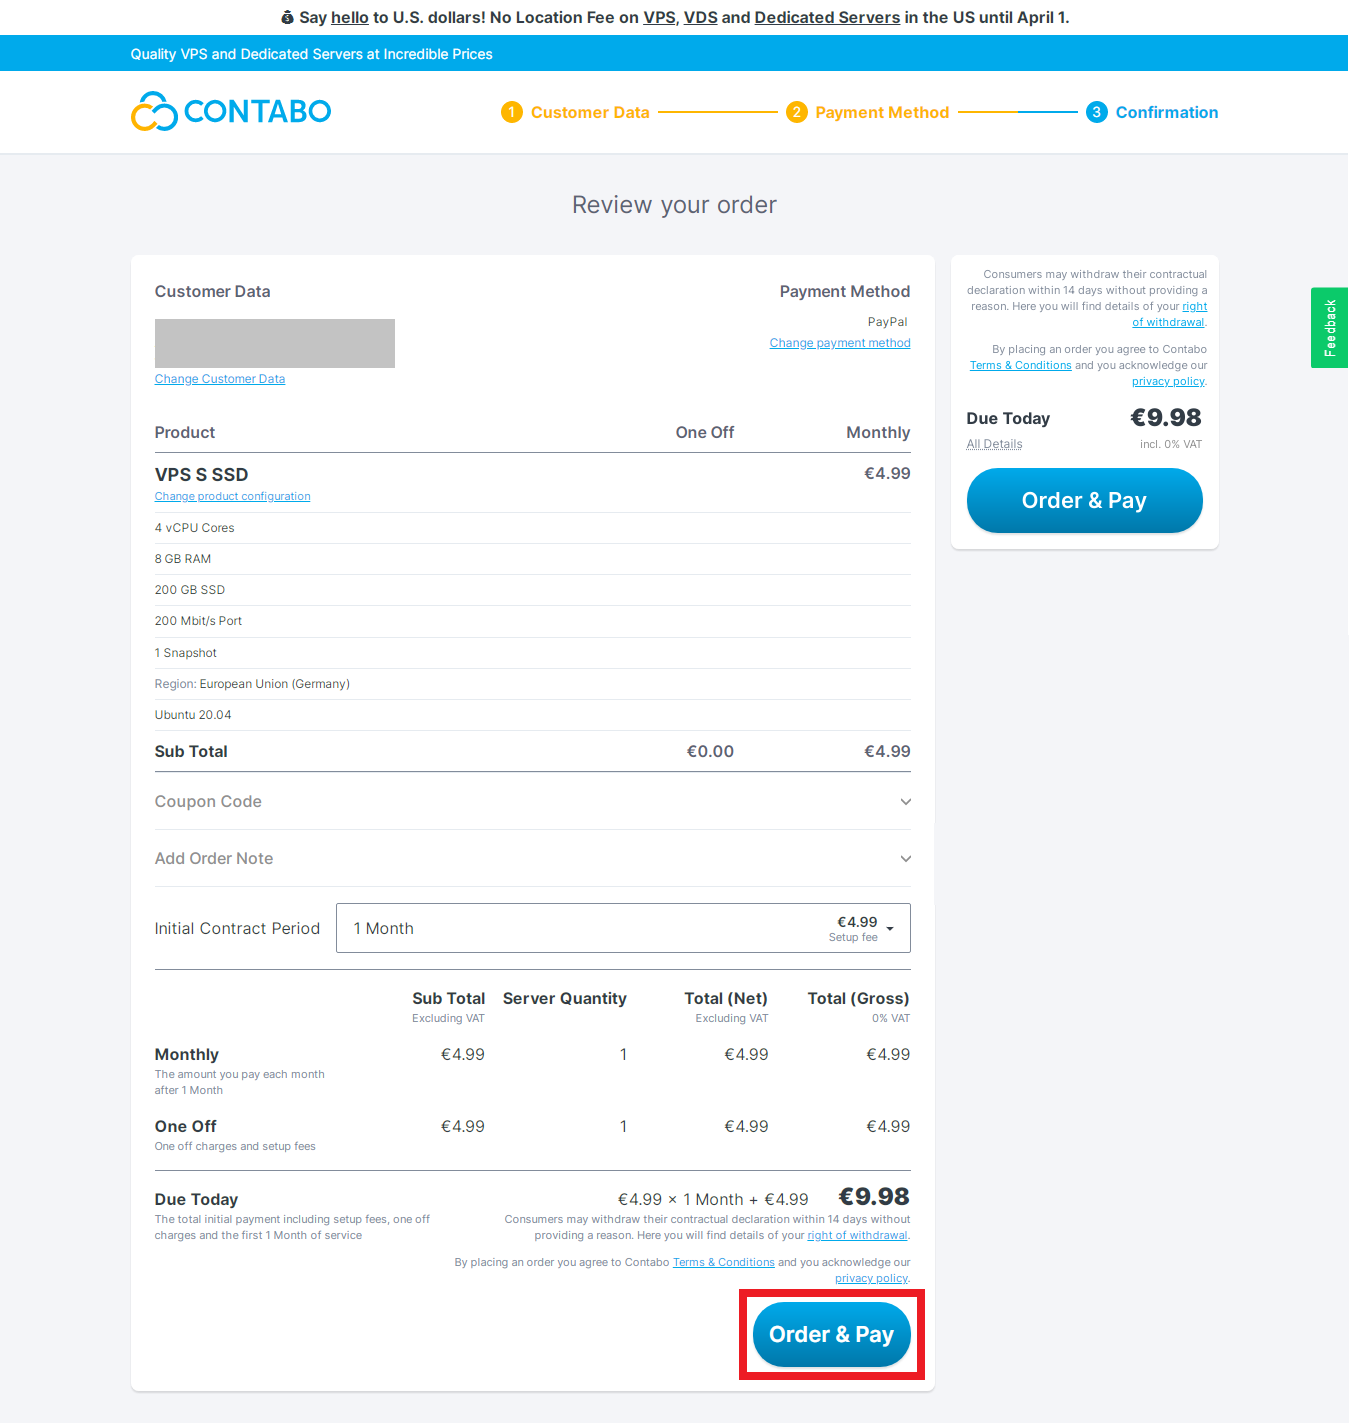
9. Review your order before the final confirmation. Note that if the Initial Contract Period is one month, your plan will be subject to a one-time setup fee (not recurring payment, next month, you will pay only €4.99). In case you choose 12 months, the setup fee will be free. Once everything is okay, click on Order & Pay.
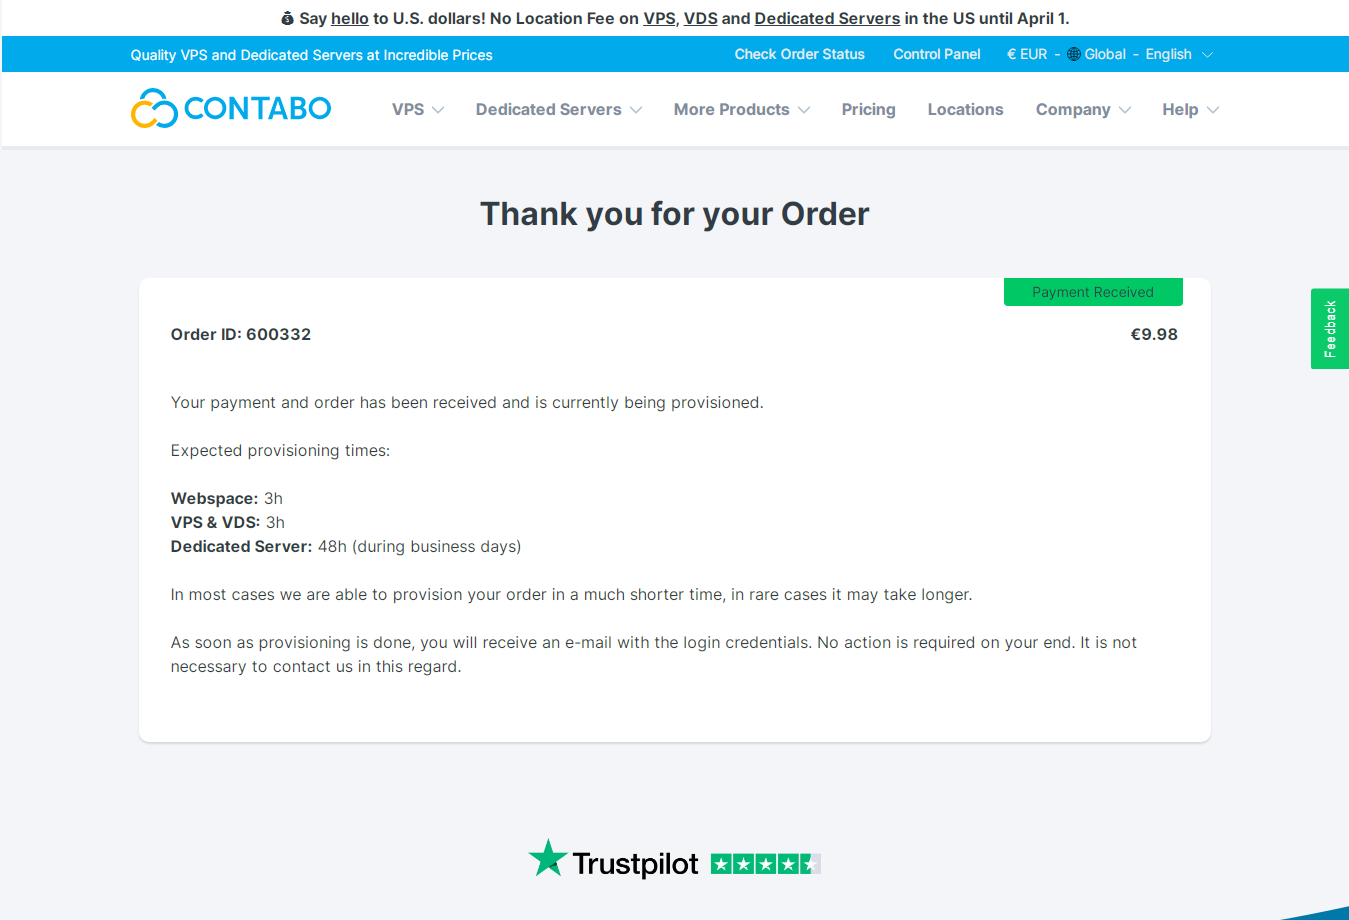
Rent VPS Confirmation
10. Once you send your payment, you will be directed to the confirmation payment page (thank you page). Also, you will receive an email (subject: Payment received!) it contains a link to check your order status. As seen below, the page shows the maximum expected time needed to prepare your VPS, the VPS will need around 3 hours max to be ready, but usually, it takes only a few minutes. In our case, it took only 21 minutes.
11. After 21 minutes exactly following the previous step, we received another email containing the login data of your VPS (subject: Your login data!). The email will contain:
- Control Panel credentials
- Control Panel address URL
- Username
- Password
- VPS info & credentials
- IP address
- Server type
- VNC IP and port
- VNC password
- VPS username
- VPS password
- Operating system
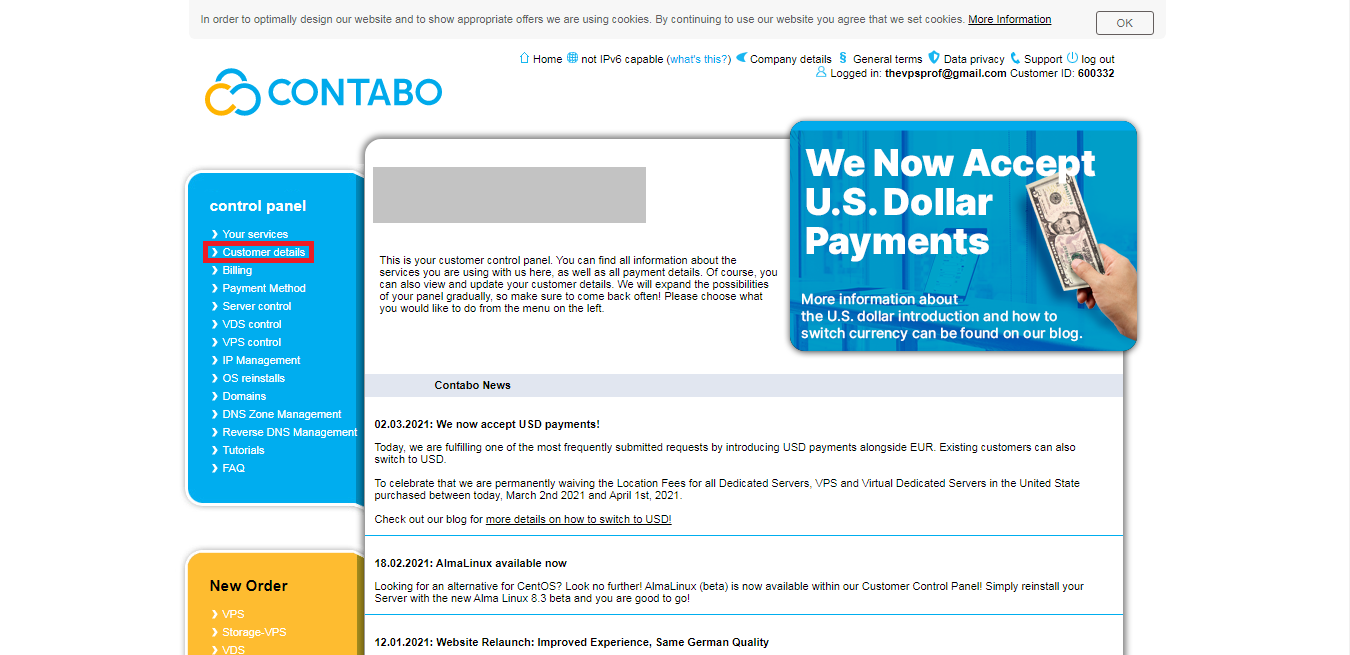
12. Let’s log in to the control panel now and change the initial password you received in the email. Go to the link provided in the email https://my.contabo.com, log in with the username and the password received in the email, then click on Customer details.
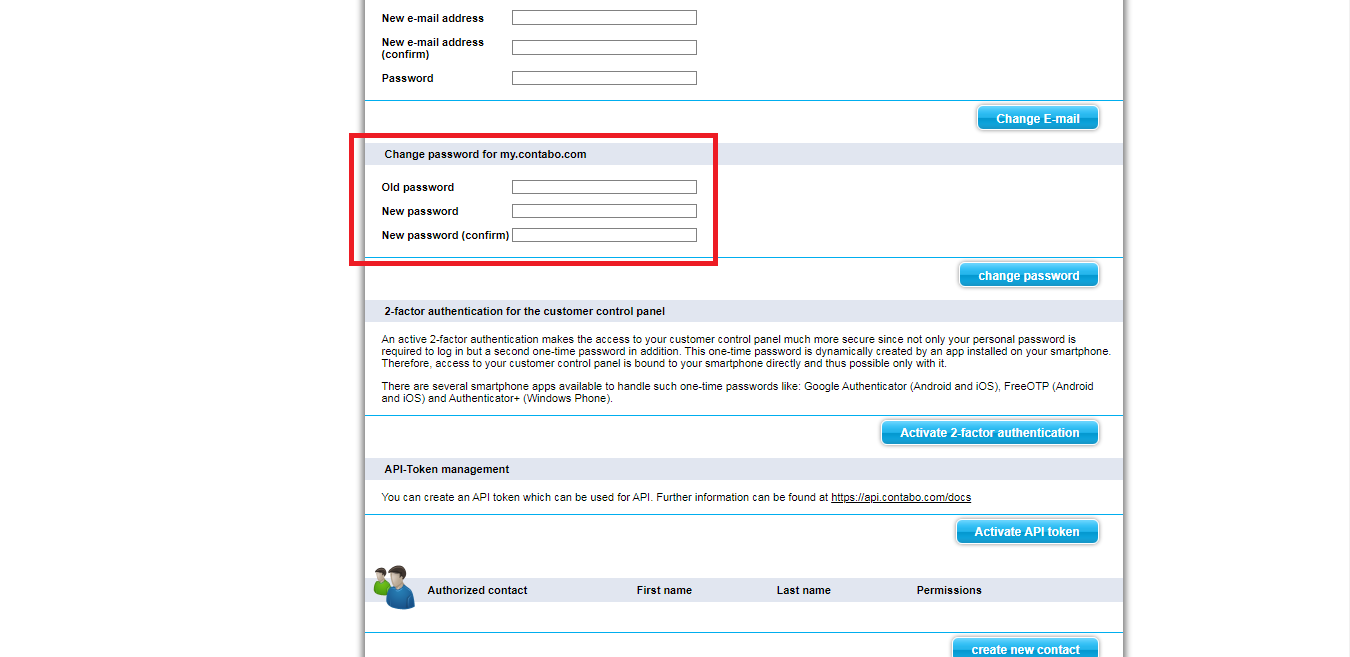
13. After that, you will see all your data on that page. You can update them, and you can enter your old password (received in the email) and then confirm the new password twice to update your password as follows.
And here we go! Once you get your server, you can log in to it easily by following the steps in this article if you use a Windows-based machine: SSH Remote Connection from Windows-based Machines. In case you use a Linux-based machine, you can refer to this article: Access via SSH from Terminal (Linux-based Machines).