SSH stands for Secure Shell. SSH remote connection can be established via PuTTY Software, it’s Easy, we’ll go through:
- a. Check Windows Version (4 steps)
- b. Download and Install PuTTY (8 steps)
- c. Configure PuTTY to Have Endless Session Time (1 step)
- d. Start SSH Remote Connection (5 steps)
- e. Change Console’s Font Size and Color (3 steps)
a. Download and Install PuTTY
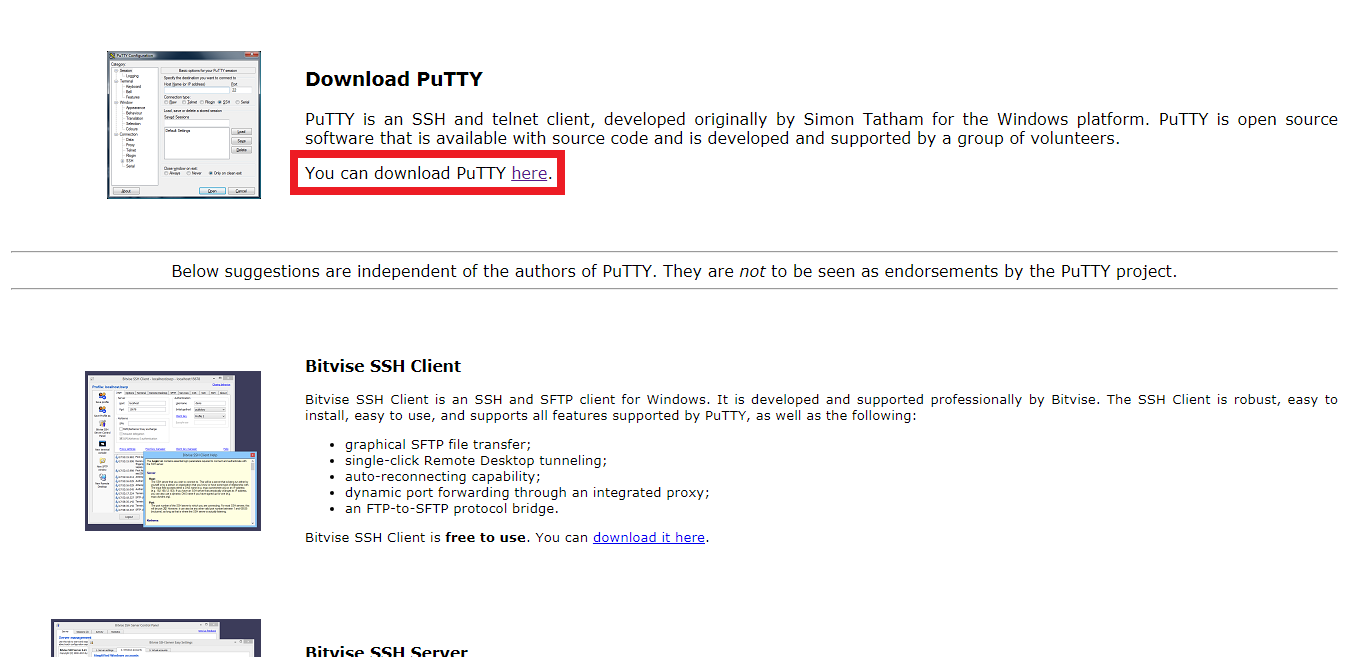
1. To start SSH remote connection from Windows-based machine to your VPS, we should use PuTTY. Let’s download it from the official website, first visit this link: https://www.putty.org. Once you’re on the website, click on here as you see in the screen shot below (inside the red rectangle).
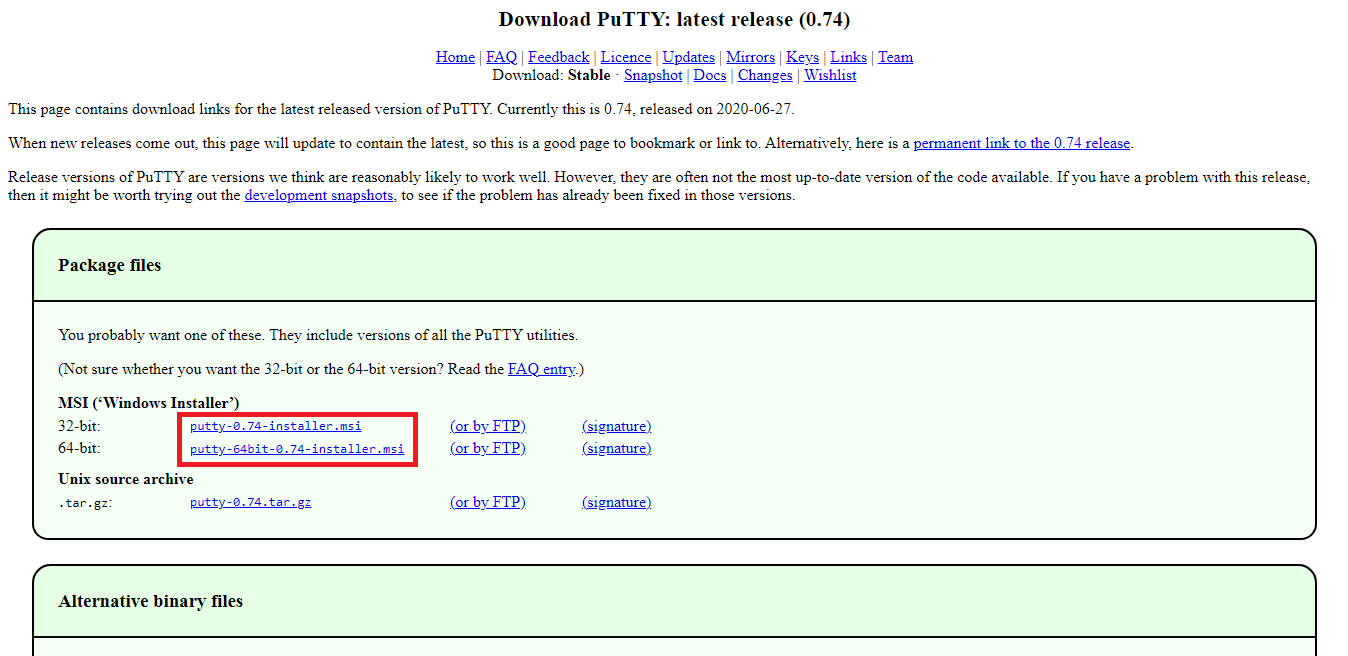
2. Choose the installer that works with your Windows operating system 32-bit or 64-bit. Click on one of the links inside the red rectangle below, it will start downloading, it’s light size, around 2.6 MB. If you can’t determine your Windows version, please click here to learn how to find it out.
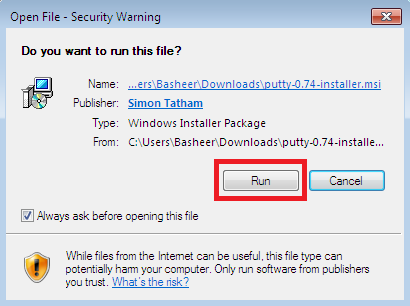
3. After downloading the installer on your PC, open it (double click left mouse click) then click on Run to run the installer.
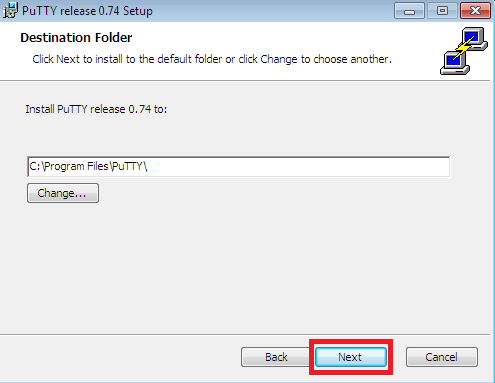
4. You will be prompted to select the destination, you can keep it as default then click on Next.
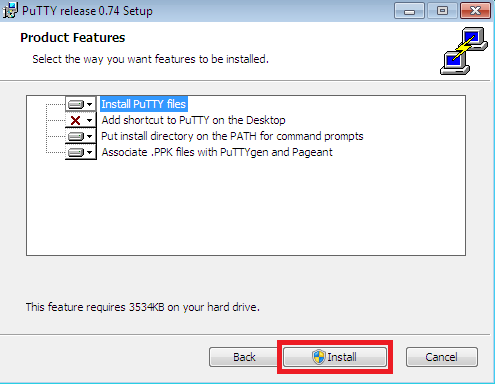
5. You will see the features, you don’t need to change anything, click on Install.
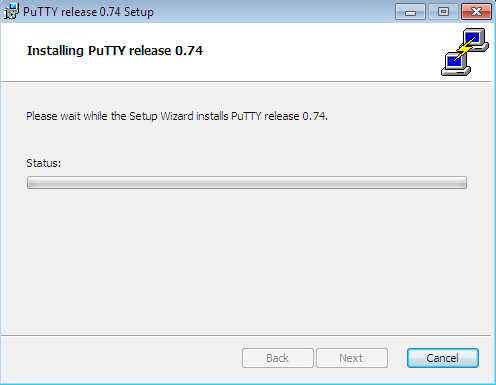
6. You will need to wait for around 1 to 2 minutes to prepare for the installation, you may get a prompt to take the approval of the admin of your Windows PC before starting the installation.
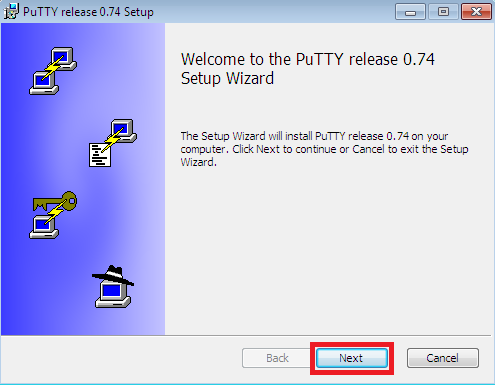
7. After waiting, the setup wizard will show up, click on Next.
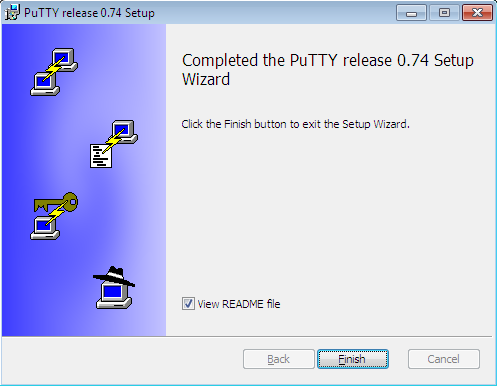
8. Congratulations, the installation is done successfully! Click on Finish.
b. Configure PuTTY to Have Endless Connection Time
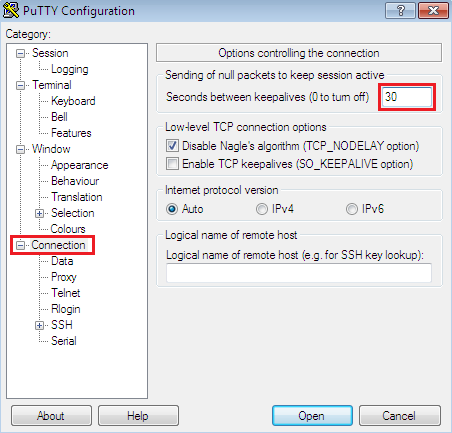
1. Now, let’s make the connection of PuTTY endless. Open the PuTTY then go to Connection category on left side (highlighted in blue) then set the value of the option Seconds between keepalives (0 to turn off) to 30.
c. Start SSH Remote Connection
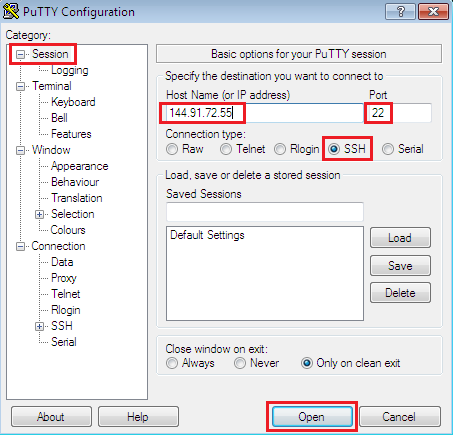
1. Let’s start our connection now and continue from the previous step. Go to Session category on the left side hand, we will need three things to login to the VPS (provided in the email):
- The IP address
- username which is root
- The password
- Port number
SSH Remote Connection Inputs on PuTTY Side
To initiate a session with the server, we need to enter the IP address and the Port number which is 22 by default as you see the required actions below.
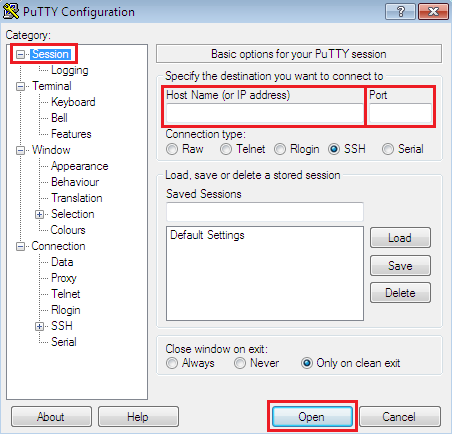
They’re entered below, use your own IP address received in the email then click on Open. Make sure that the Connection type is SSH marked as seen. Also, make sure not add white spaces at the end of the IP address as it will corrupt the connection.
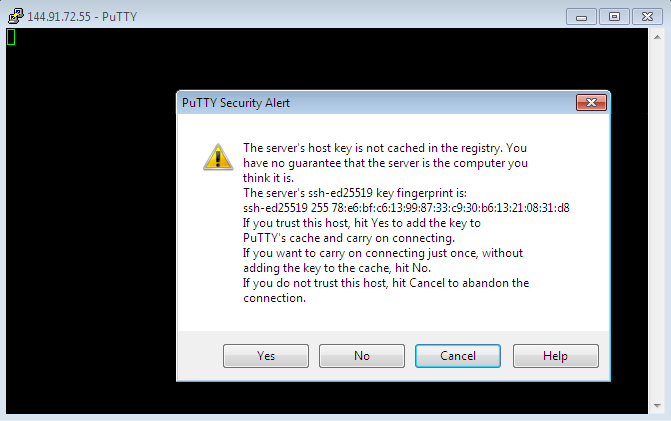
2. The session with the server will be initiated and when it’s first time, you will have to confirm whether you want to cache the server’s host key in the registry, if you click on Yes, the security alert will not appear next time you connect to your VPS. We will click on Yes.
SSH Remote Connection Inputs on Server Side
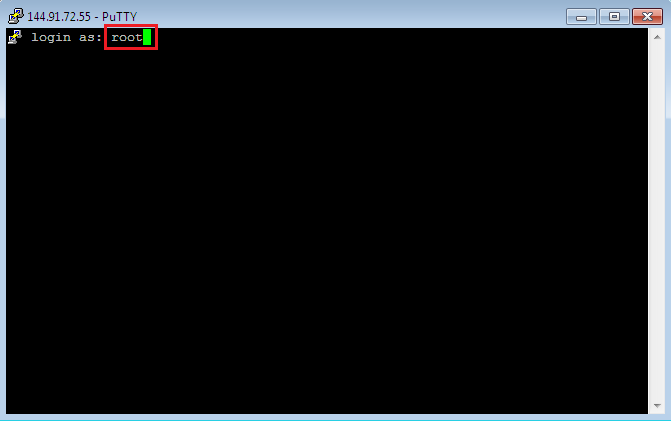
3. The VPS will ask you for the username to login, enter the username you received in the email which is: root as follows.
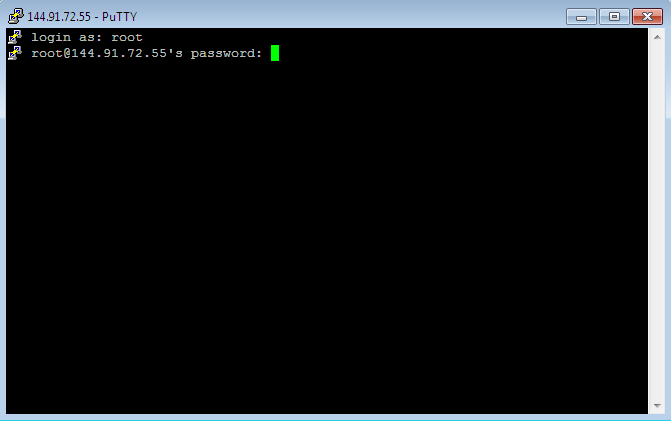
4. The VPS will ask you for the password, you will find it in the email too. Typing the password is a bit hard, so copy it from the email (Ctrl+c) then paste it on PuTTY by clicking a (single right mouse click) anywhere on the black plain of the PuTTY then hit Enter key, it’s the way how we paste text on PuTTY, the paste will start from the green cursor. Note that when you paste/enter the password, the cursor will not move or show stars like what’s going on Windows operating system.
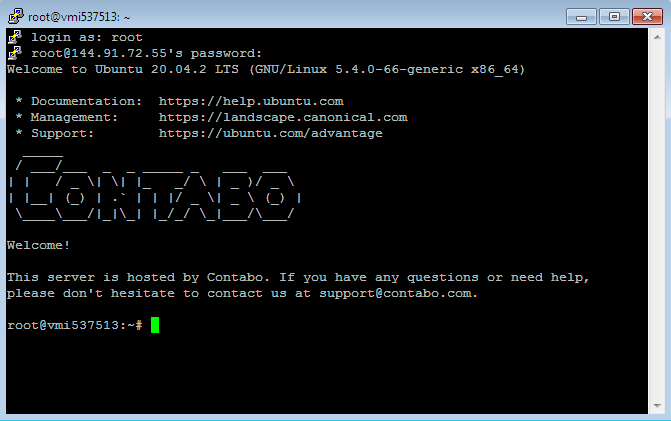
5. Once you enter the password and hit Enter key, we will successfully enter your VPS 🙂
d. How to Save, Load, Delete & Manage Sessions
1. Save Sessions
Instead of adding the IP address and the port number every time to the PuTTY to login to the VPS, we’ll save them to make it easier and faster to initiate a session with the VPS. Let’s do it now.
- Go to Connection under Category (left column) then set the value of the option Seconds between keepalives (0 to turn off) to 30 to have endless session time for our saved sessions.
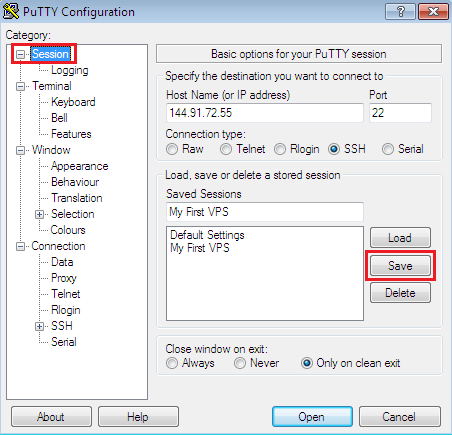
- Go to Session under Category (left column) then add your IP address, the Port number and your session name (My First VPS) under Saved Sessions as seen below, then click on Save button.
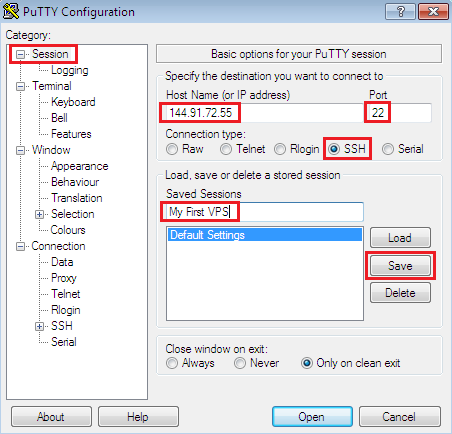
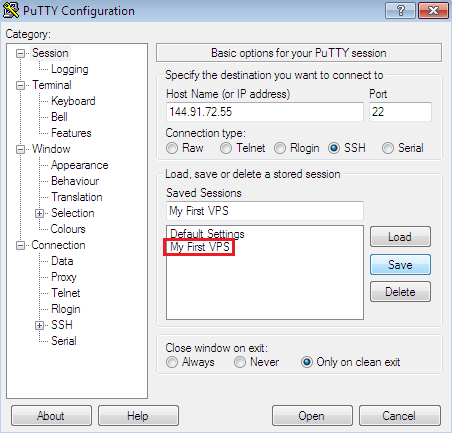
- After clicking on Save button, your session will be saved in the box under Default Settings as follows.
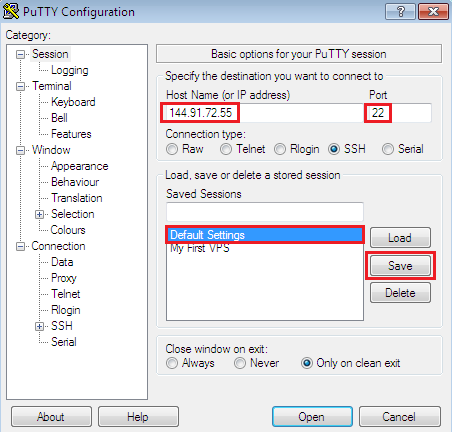
2. Save Default Session
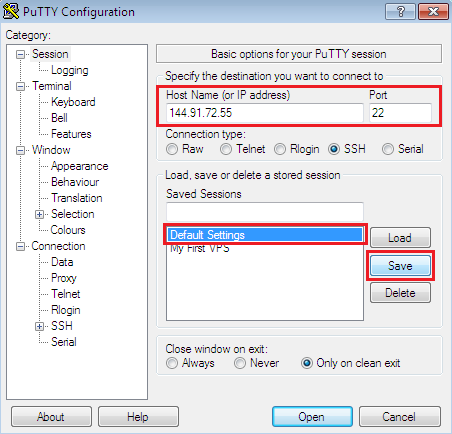
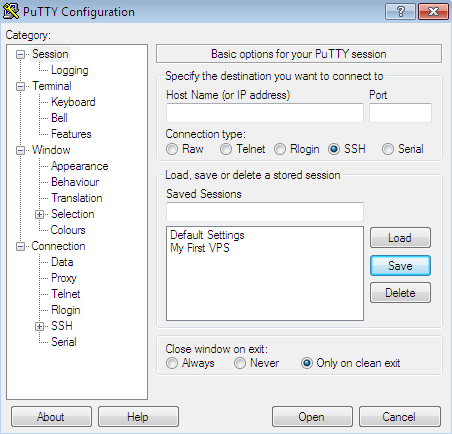
- If you want to save a default session, just add the IP address and the port number on top, click on Default Settings (it will be highlighted in blue), then click on Save button.
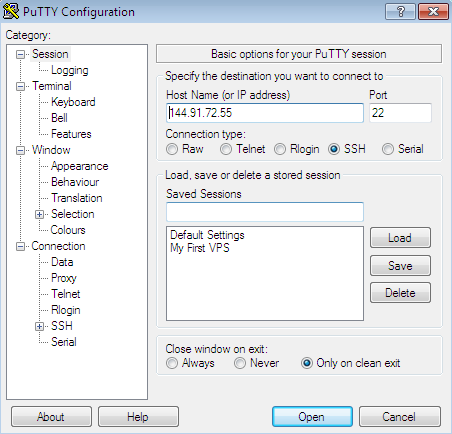
- Default session means that your IP address and the port number will show up by default when you open the PuTTY. To test if it works, close the PuTTY then open it again, you will see something like this:
3. Load Sessions
- To load a saved session, just click on your saved session (My First VPS) then click on Load button.
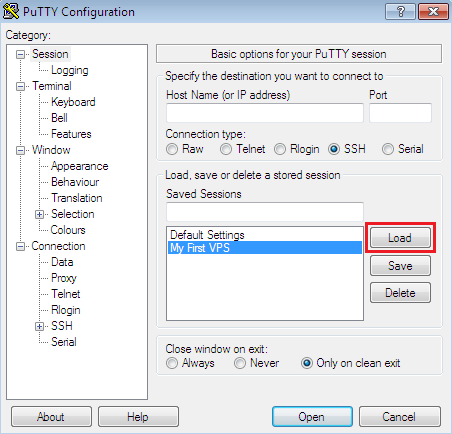
- After clicking on Load button, your VPS’s IP address and port number will be loaded on top as you see. Click on Open button to start the session with the server as seen.

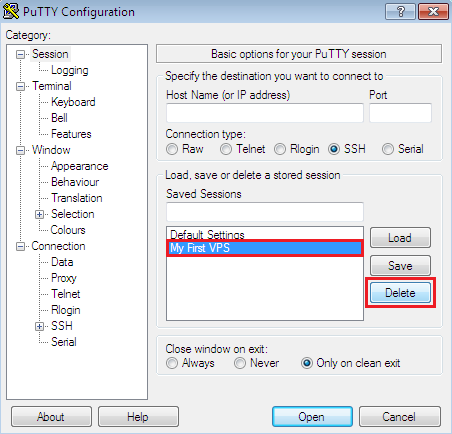
4. Delete Saved Sessions
To delete a saved session, just click on it, then click on Delete button.
5. Delete Saved Default Session
To delete a default saved session which appears on top, do the following:
- Clear the IP address field and the port number field, i.e. delete them.
- Click on Default Settings (it will be highlighted in blue color)
- Click on Save button.
- Once you click on Save button, it will look like below and when you close PuTTY and open it again, the default IP address and the Port number fields will be empty.
6. Start SSH Remote Session Quickly
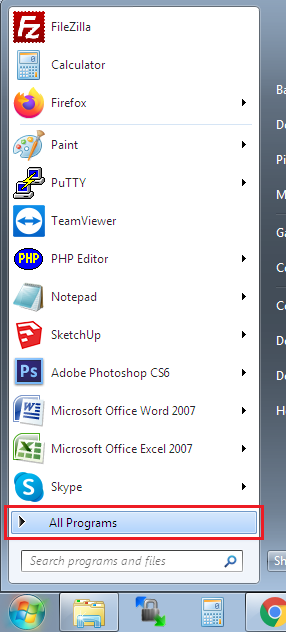
- To start sessions quickly, first, you need to pin PuTTY on Windows Taskbar. Go to All Programs then as follows.
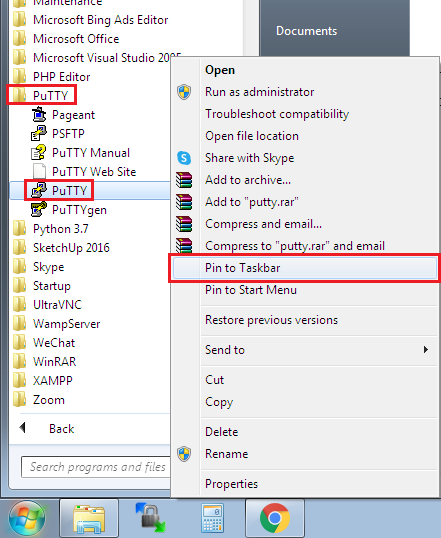
- Go to PuTTY folder, open it, click (right mouse click) on the PuTTY file inside the folder, then click on Pin to Taskbar option.
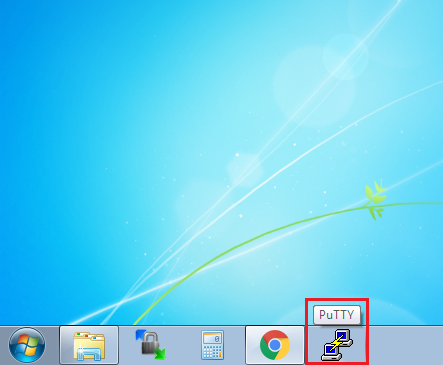
- After that, you will see PuTTY is pinned on the Windows taskbar as below.
- To start sessions quickly, you can pin your previous sessions on PuTTY. Just click (right mouse click) on the pinned PuTTY icon on the taskbar, hover over any previous session under Recent Sessions and click on the small pin icon.
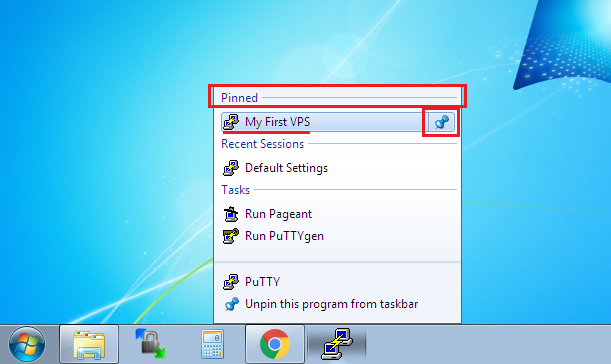
- Once you pin a session, it will appear under Pinned category as seen, you can unpin it same way you pinned it. When you click on the pinned session, it will take you to the server direct and there will be no need to open PuTTY and load any of the saved sessions there.
7. Exit SSH Remote Session
To exist the session, just type: exit, then hit Enter key, it will close immediately.
root@vmi537513:~# exit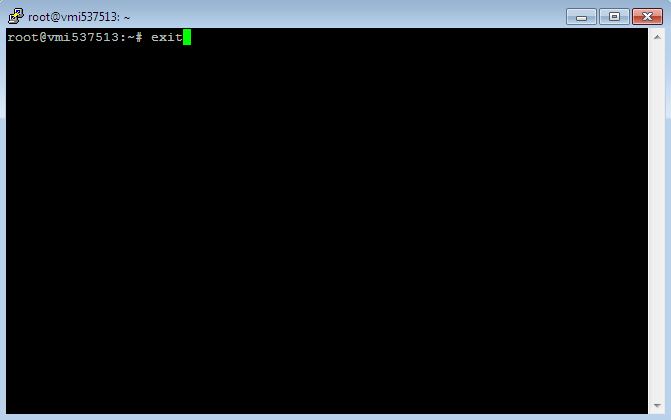
e. Change Console’s Font Size and Color
1. Load any saved session by clicking on your saved session (My First VPS) then click on Load button.
2. After clicking on Load button, your IP address and port number will be loaded on top as you see. Click on Appearance. You will get a new window to customize the font and the size of the console text as seen below:
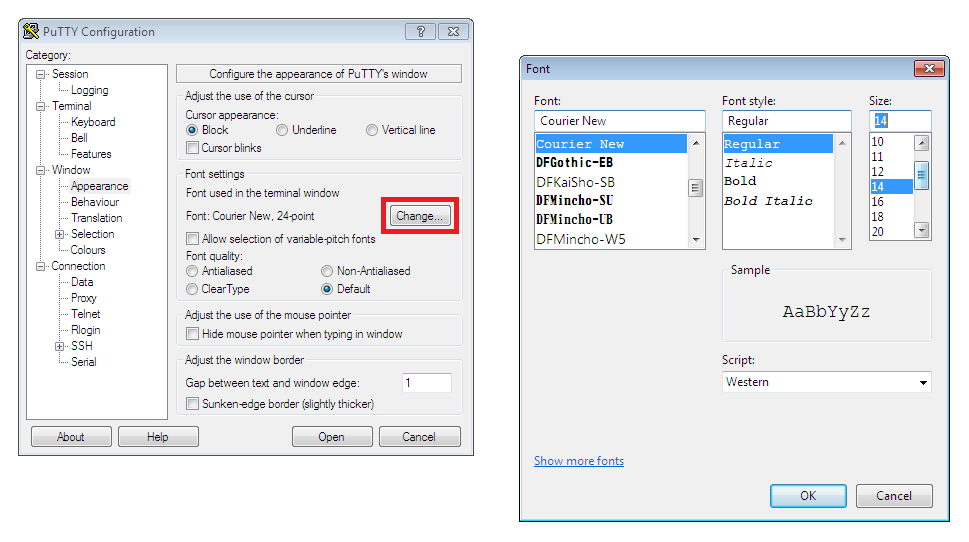
3. Save the session again after the change by going to Session then click on Save as seen below:
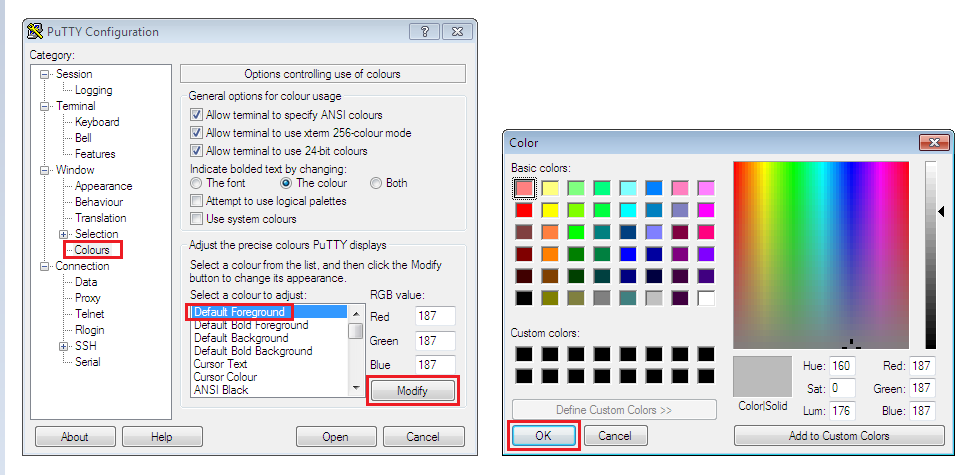
4. To change colors, do same steps we made for the appearance (font style and size) but instead of clicking on Appearance, click on Colours then click on Default Foreground, then click on Modify, then change the color and click on OK.
5. Don’t forget to go back to Session on the list and save the session by clicking on Save.
Refer to Access via SSH from Terminal (Linux-based Machines) article to login to server from Linux-based machine.