
iRedMail includes all the required packages for the email server where you don’t need to install them separately. We recommend installing iRedMail on empty new server to avoid conflict with the preexisting packages.
To install iRedMail, your server needs a minimum of 2 GB of RAM to work flawlessly as it contains many components. For this purpose, you can rent a VPS with great specs starting from 8 GB RAM for only €4.99. We tested installing iRedMail server there and the performance was just perfect! Before installing iRedMail, you should fix DNS settings by referring to our DNS Settings article. Let’s do the following now:
- a. Download iRedMail Installer (3 steps)
- b. Install iRedMail (16 steps)
a. Download iRedMail Installer
We need to download the latest version of iRedMail installer to our server. To find the latest version and download it, do the following:
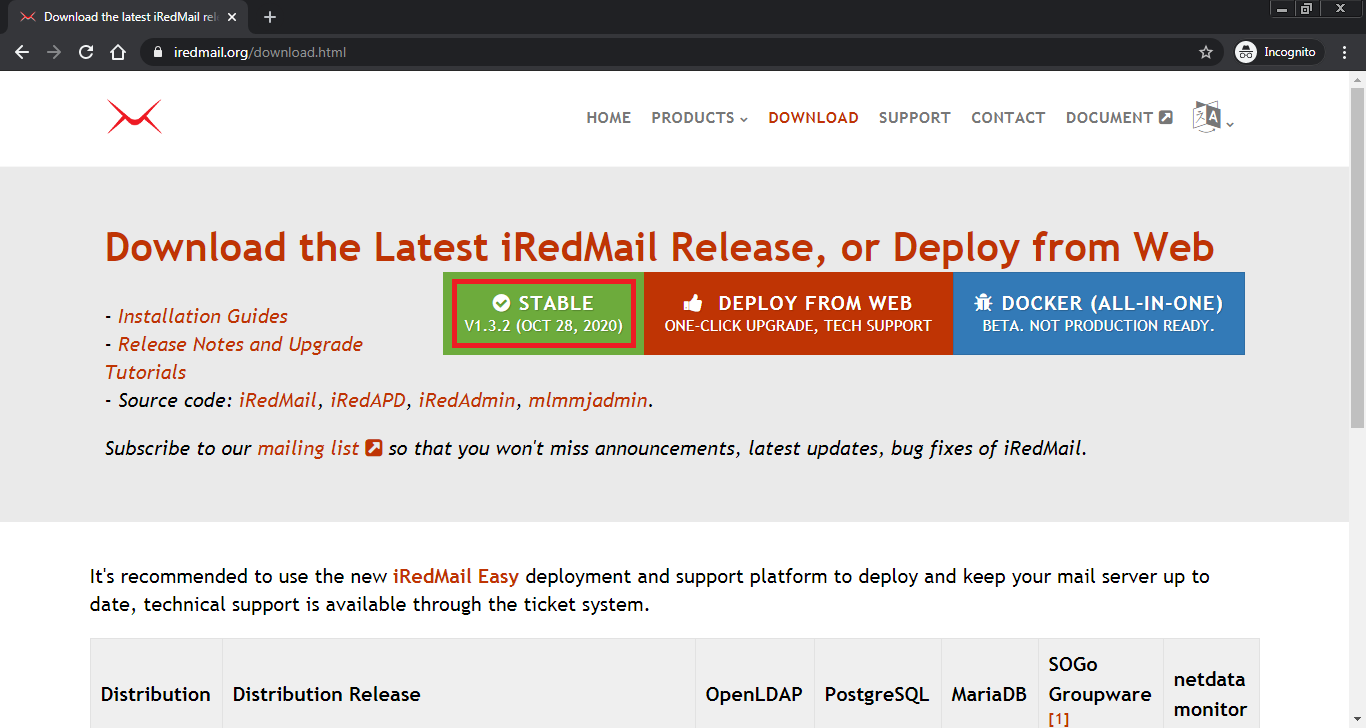
1. Just visit the download page on the official iRedMail website: https://www.iredmail.org/download.html, then click (a single right click) on the latest stable version (marked by a rectangular frame below).
2. Click “right mouse click” then select: Copy link address.
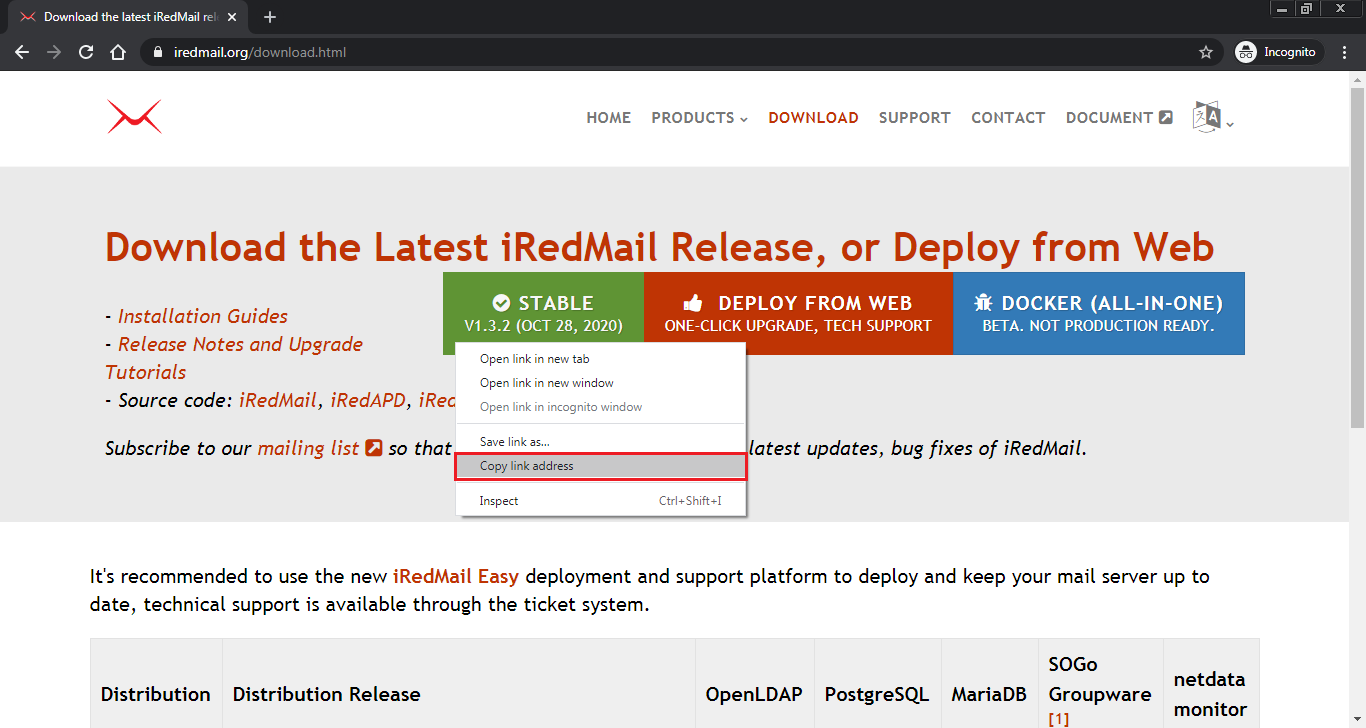
3. Once we get the link address which is (https://github.com/iredmail/iRedMail/archive/1.3.2.tar.gz), we will use the wget command to download the latest version of iRedMail. The copied link will follow the wget command on PuTTY SSH client or any Linux terminal as below:
root@mail:~# wget https://github.com/iredmail/iRedMail/archive/1.3.2.tar.gz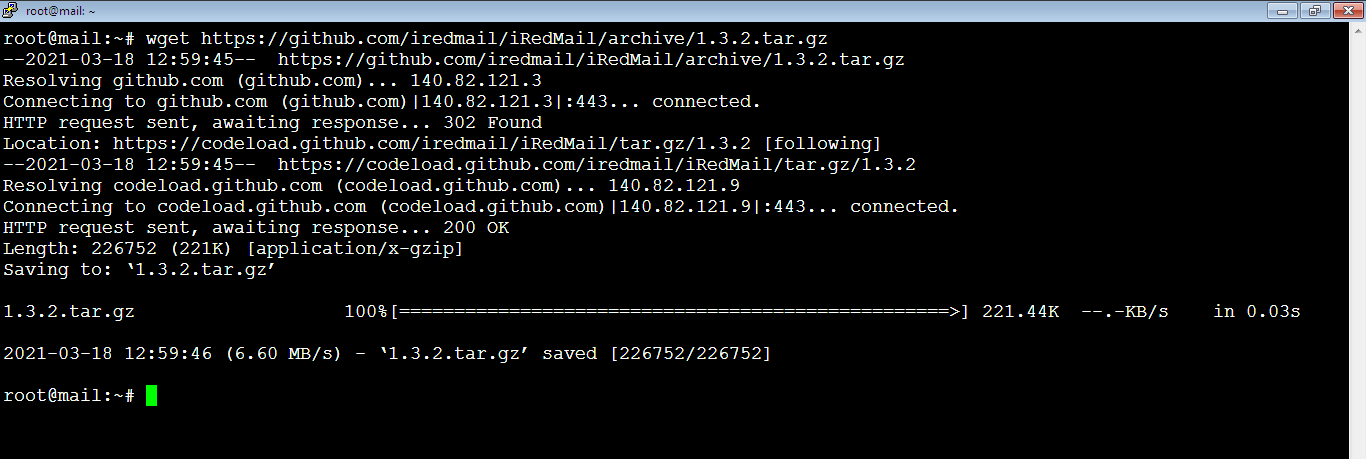
Now, let’s make sure that the iRedMail archive file has been downloaded by running the command to list the files and directories of the current location:
root@mail:~# lsAs you see, it’s there in red.

b. Install iRedMail (15 steps)
1. Let’s extract the downloaded archived file by running the command:
root@mail:~# tar xvf 1.3.2.tar.gz
Once it’s done, it will look like this:
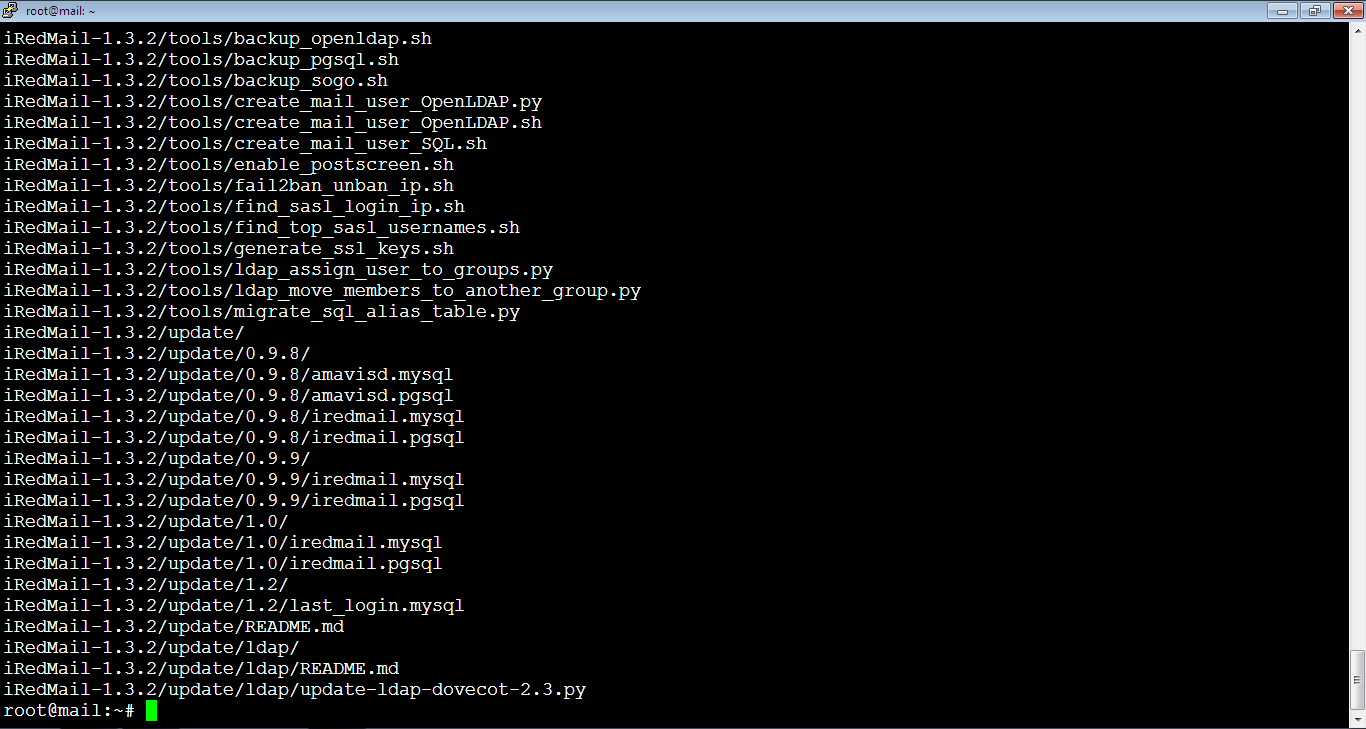
Check the directory after the extract by using the command:
root@mail:~# lsYou will see the extracted file in blue (iRedMail-1.3.2).

2. Enter the iRedMail-1.3.2 directory by running the following command then hit Enter key:
root@mail:~# cd iRedMail-1.3.2
Notice the command prompt how it looks like after entering the iRedMail-1.3.2 directory (root@mail:~/iRedMail-1.3.2#)
You can see what’s inside the iRedMail-1.3.2 directory by using the list command:
root@mail:~/iRedMail-1.3.2# ls
3. Add executable permission to the iRedMail.sh script which is inside the iRedMail-1.3.2 folder by the command:
root@mail:~/iRedMail-1.3.2# chmod +x iRedMail.sh
4. Run the Bash script of the iRedMail installer by running the following command:
root@mail:~/iRedMail-1.3.2# bash iRedMail.shYou will need to wait for about 30 seconds before loading the setup wizard.

Setup Wizard
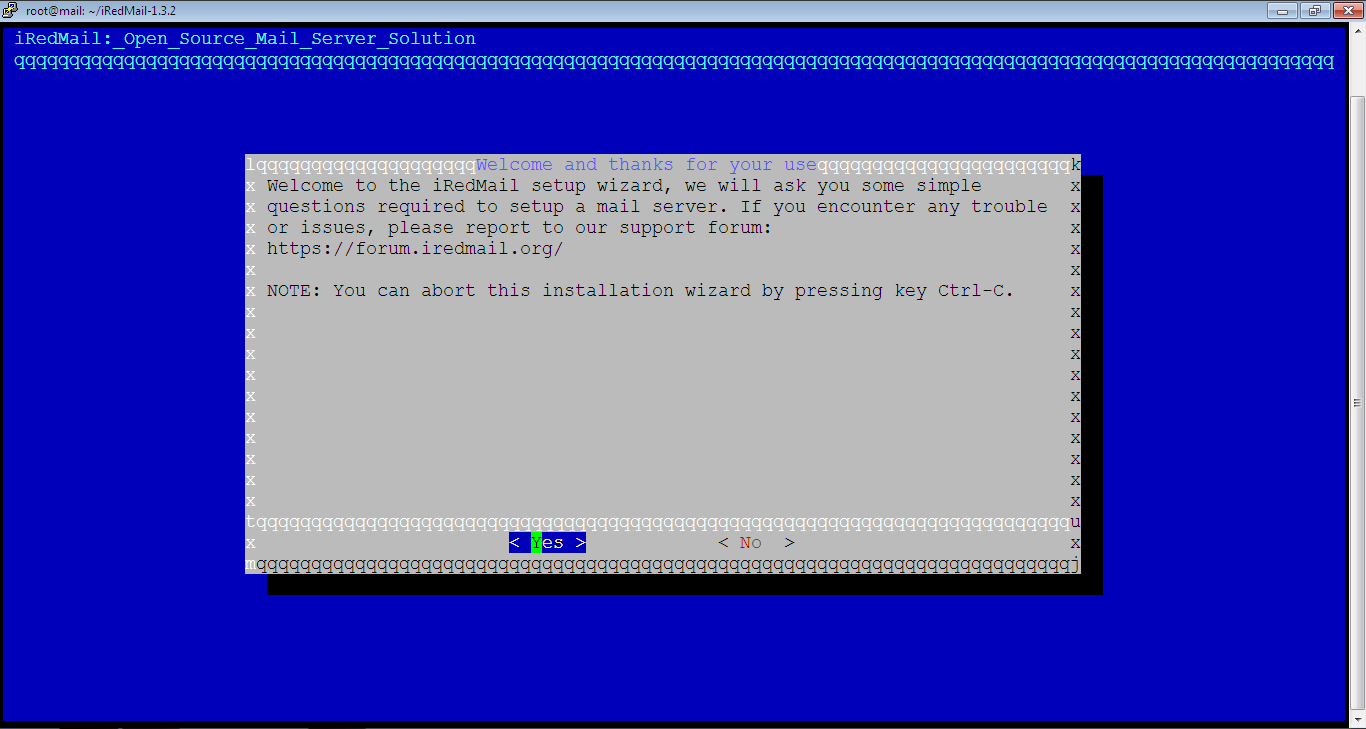
5. After waiting, the setup wizard will appear, use the Tab key to move select Yes and No, if you want to proceed, select Yes, then hit Enter key. If you want to quit, press: Ctrl+C.
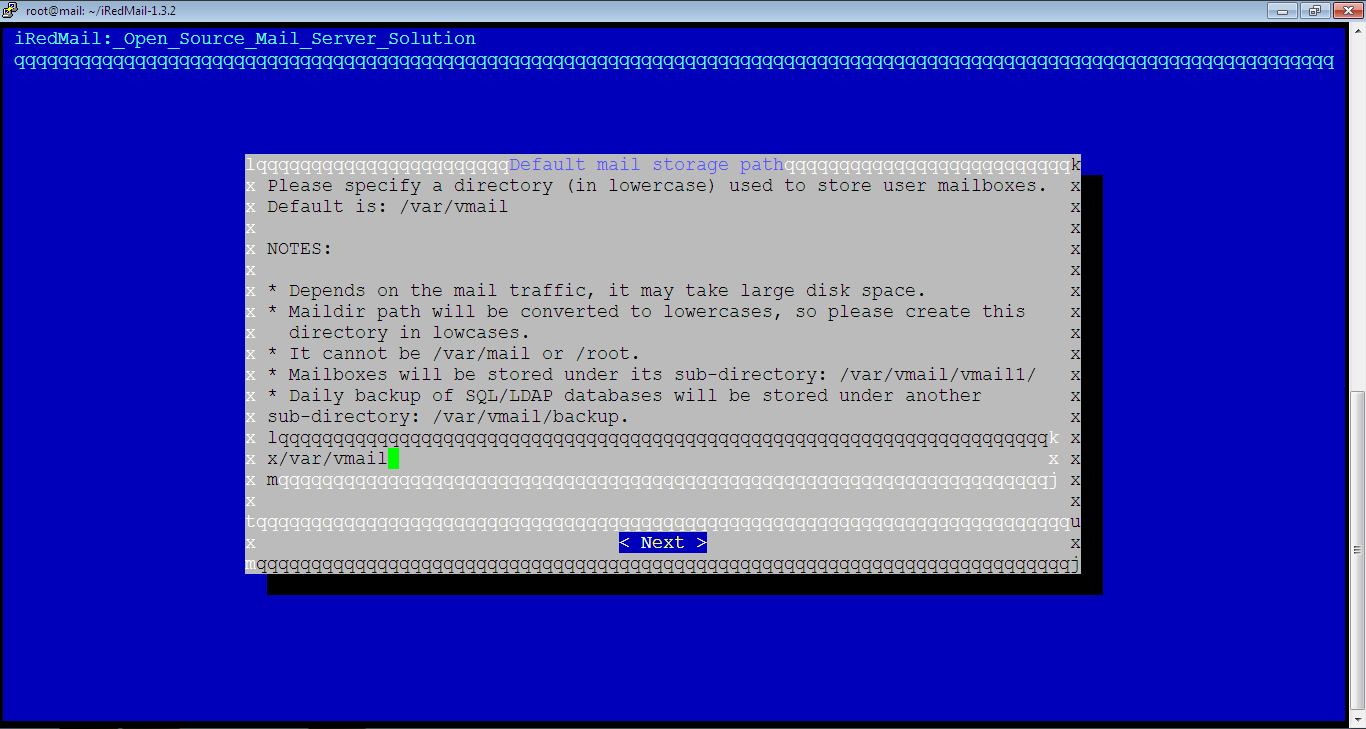
6. Specify the default mail storage path. The default one is /var/vmail. Keep it as it is then hit Enter key.
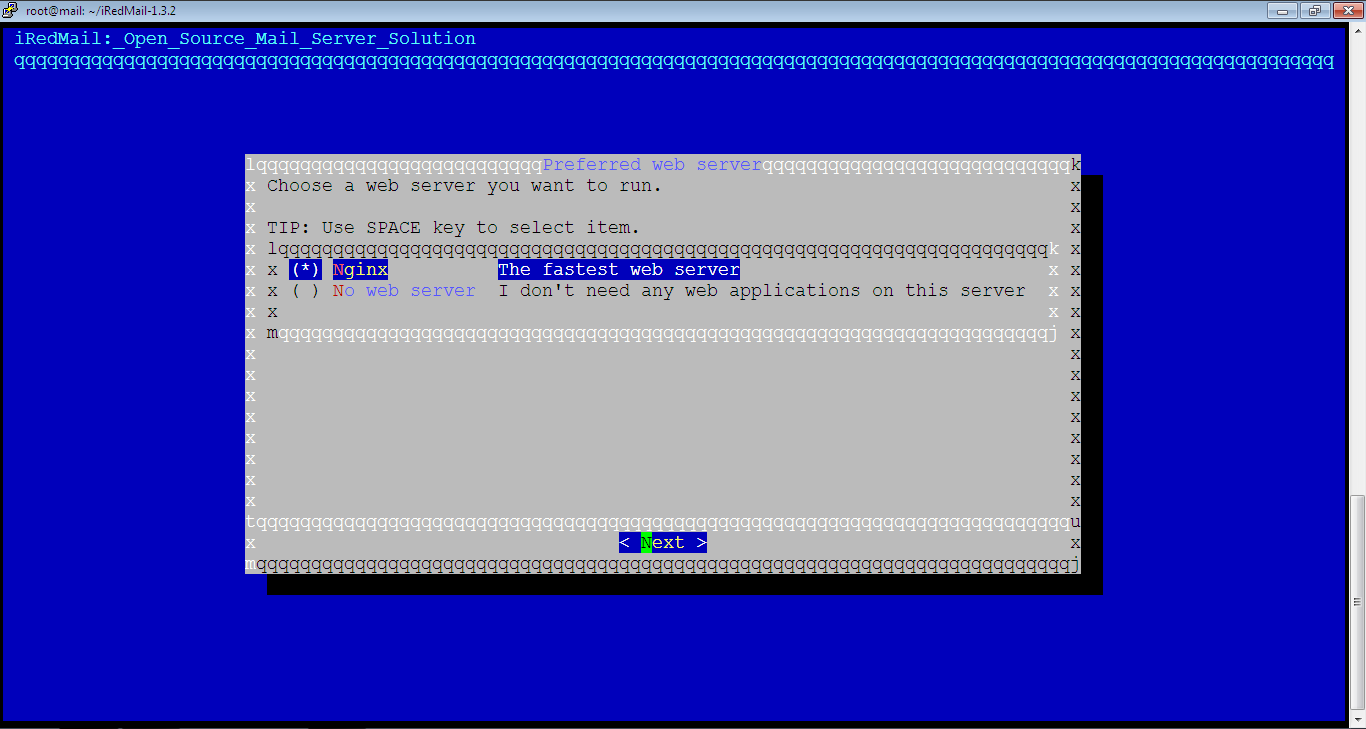
7. You should choose the preferred webserver. The webserver role is to access the web-based admin panel to manage email accounts. Nginx webserver is selected by default, keep it as it is then hit Enter key.
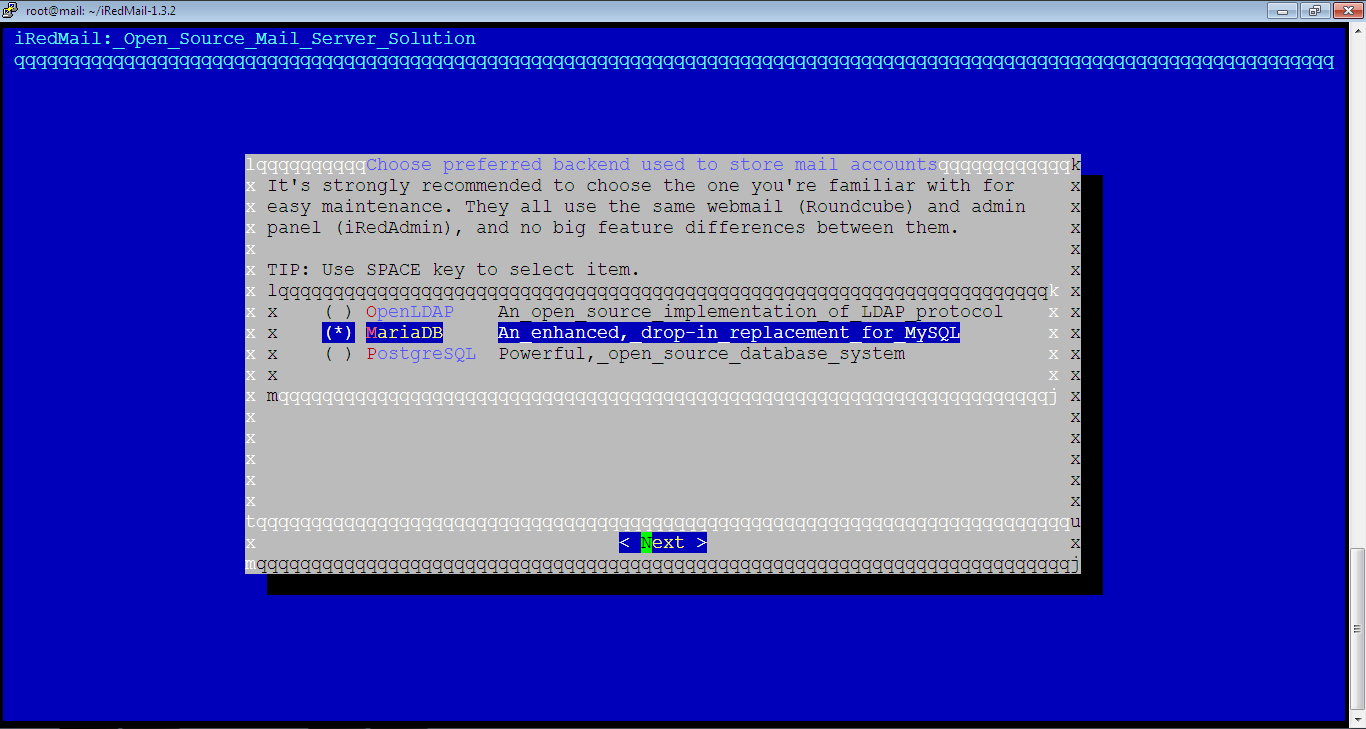
8. Now, it’s the time to choose the storage backend of for the mail accounts. By default, none of them is selected. Navigate between them by pressing up/down arrow keys then select MariaDB by pressing space bar key. After that, hit Enter key to proceed.
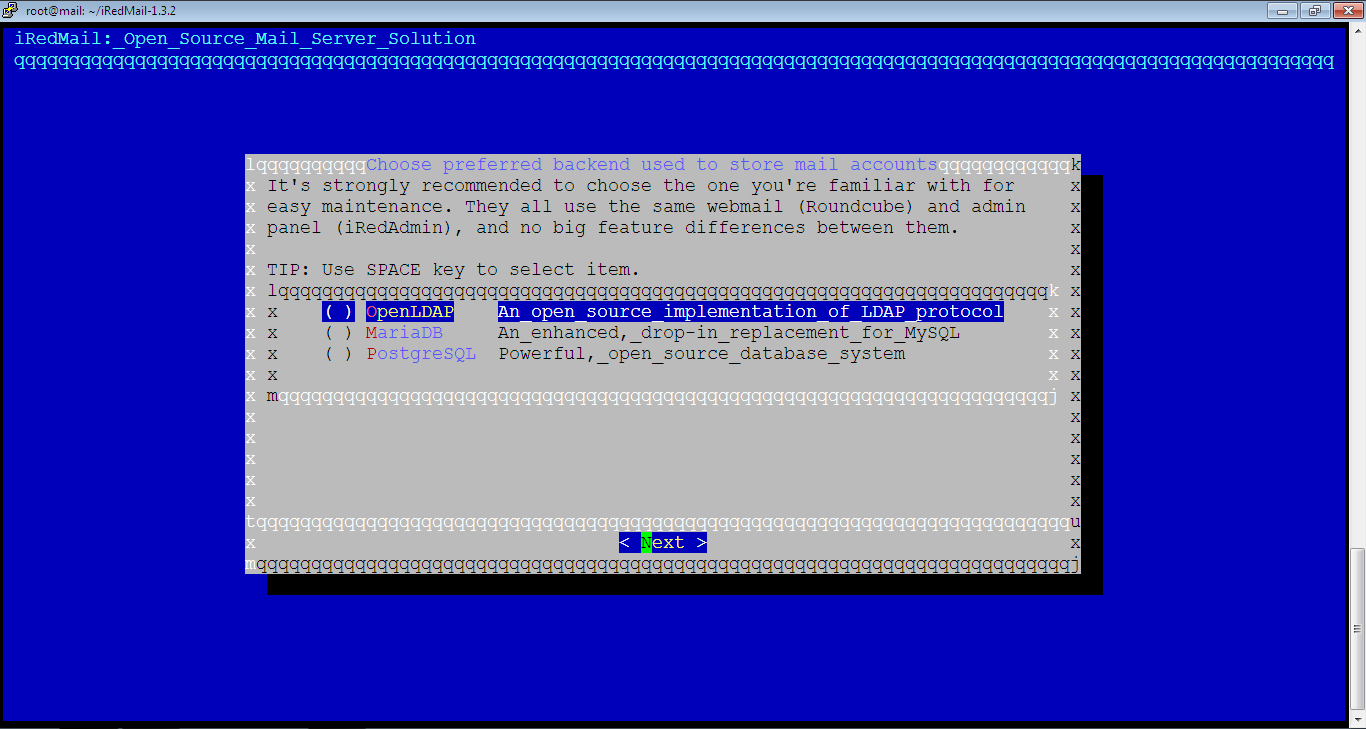
As you see, here we’ve selected MariaDB before hitting Enter key.
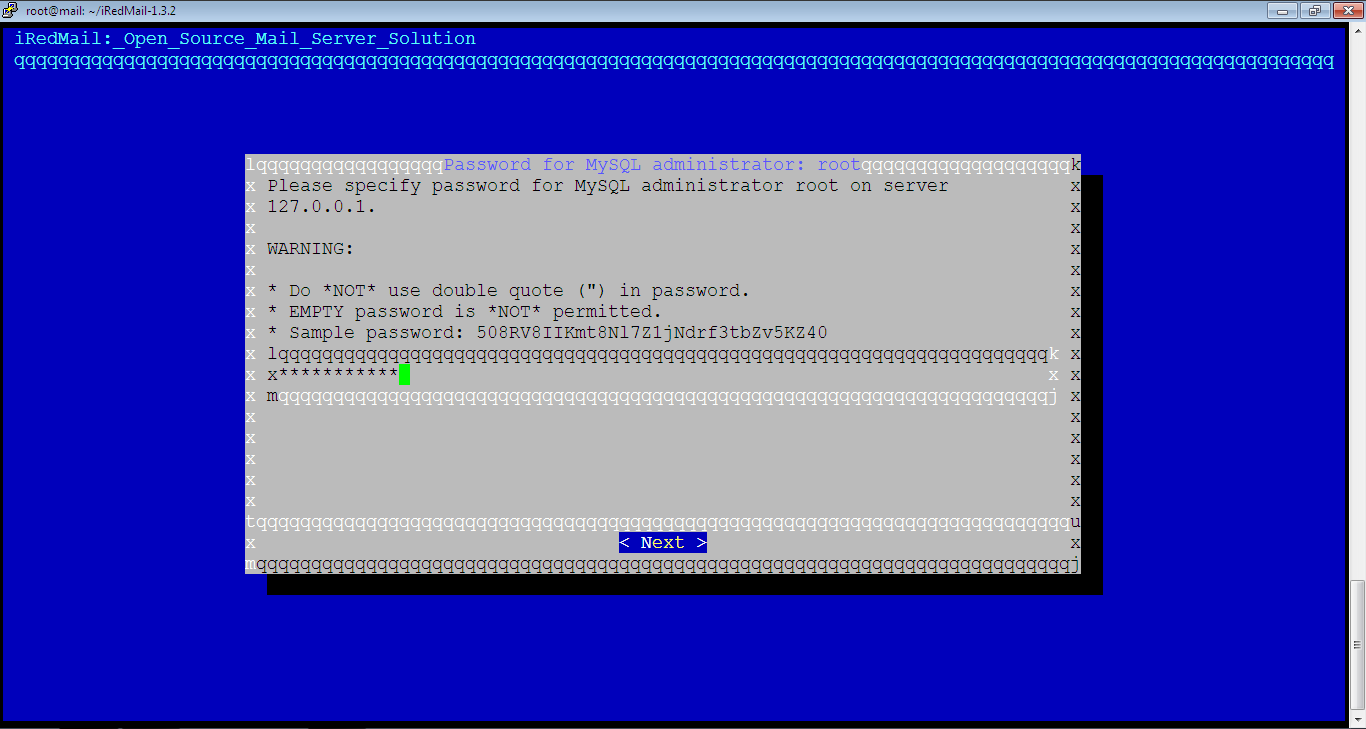
9. You need to enter root password for MariaDB(MySQL). Enter strong password without double quotes then hit Enter key.
10. Enter iRedMail first mail domain name, like: example.com.
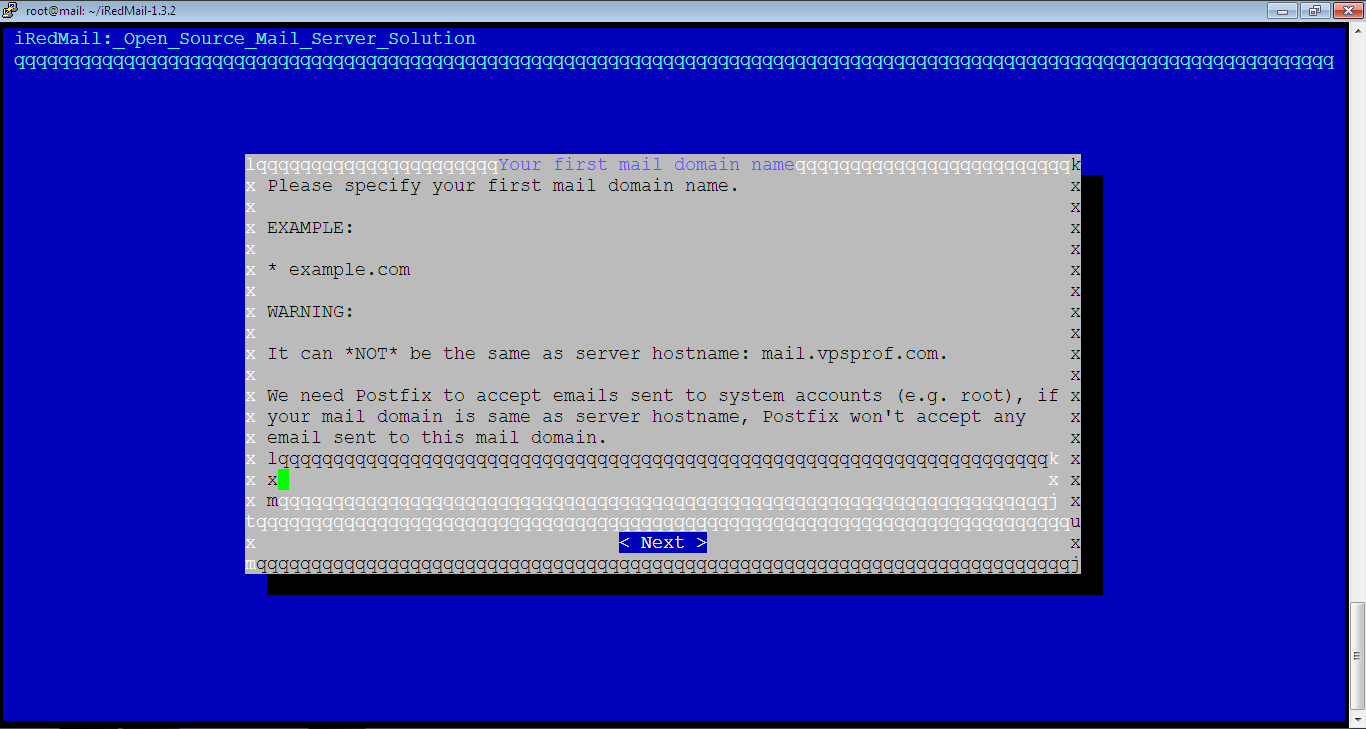
We entered: vpsprof.com, as you see below:

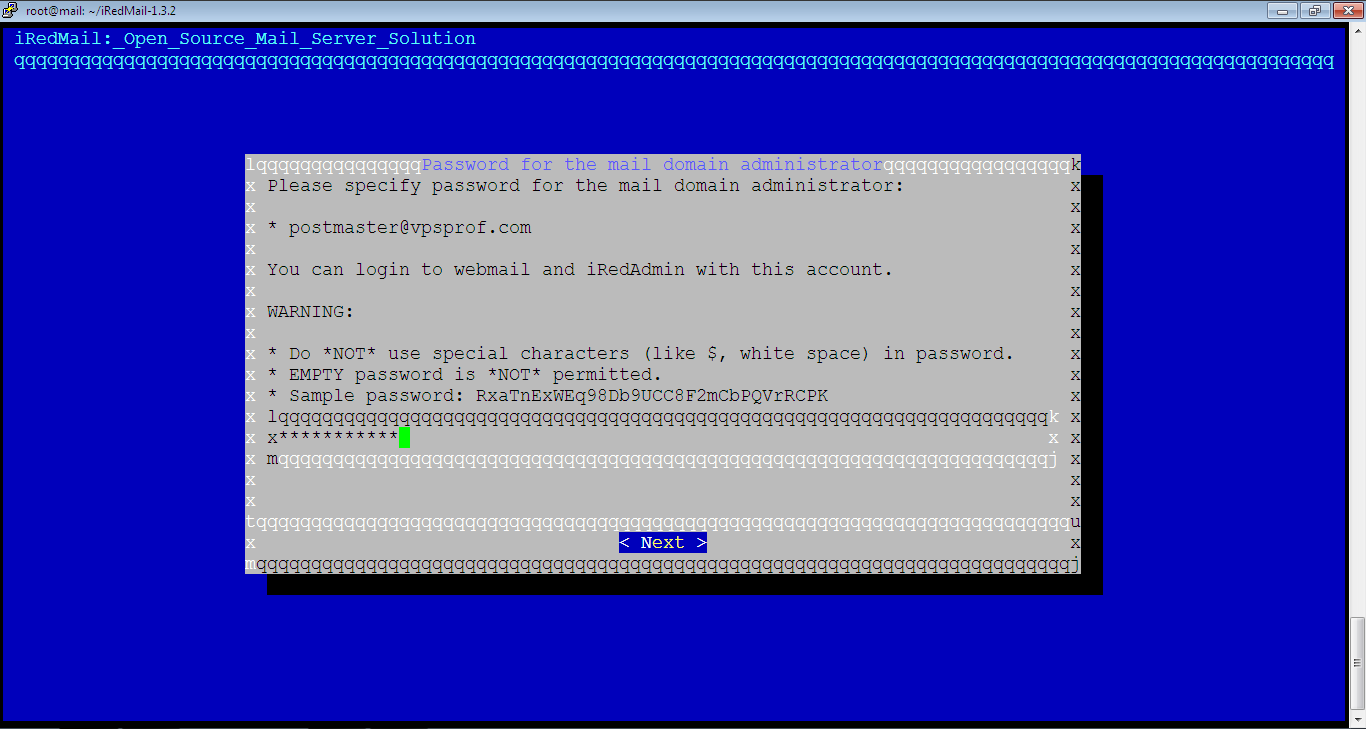
11. You need to enter the password for the postmaster email address which is: postmaster@vpsprof.com. You will be able to access it from the web-based panel. Once you enter the password, hit Enter key.
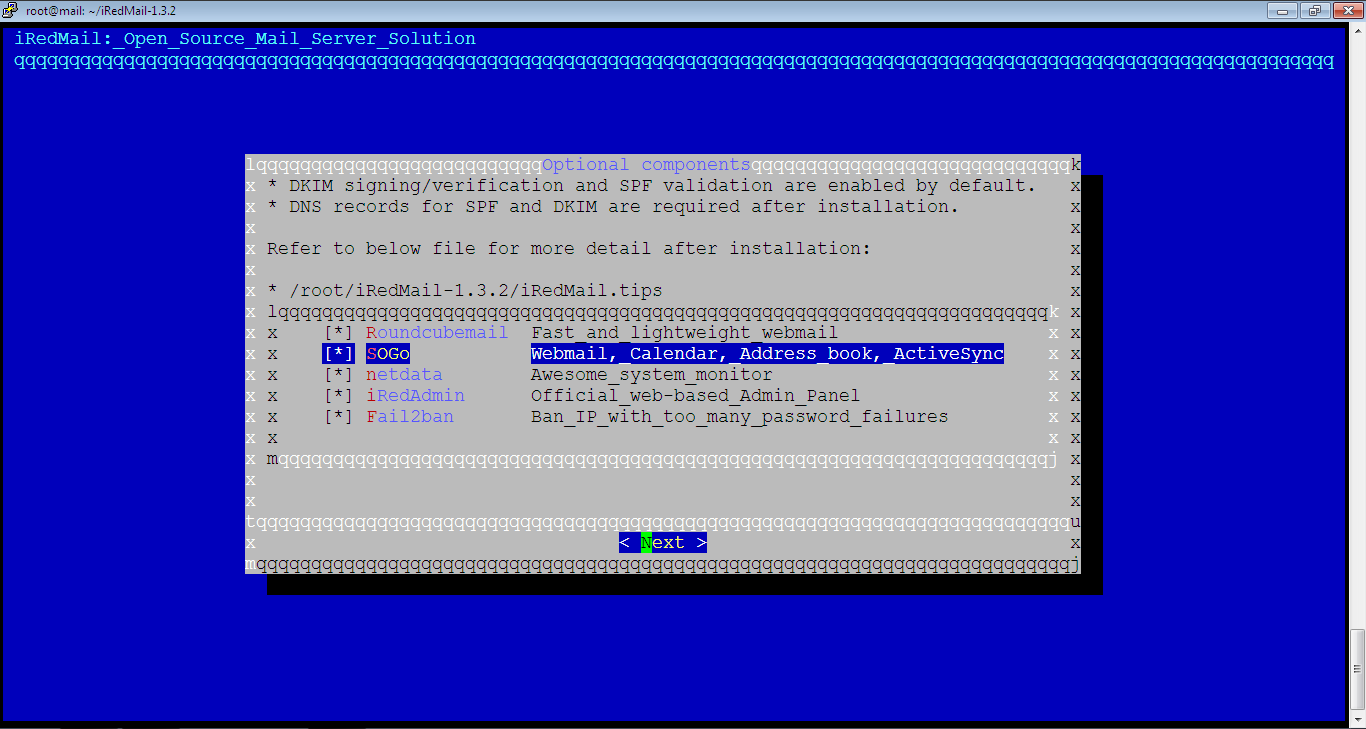
12. Choose optional components, by default, SOGo is not selected.
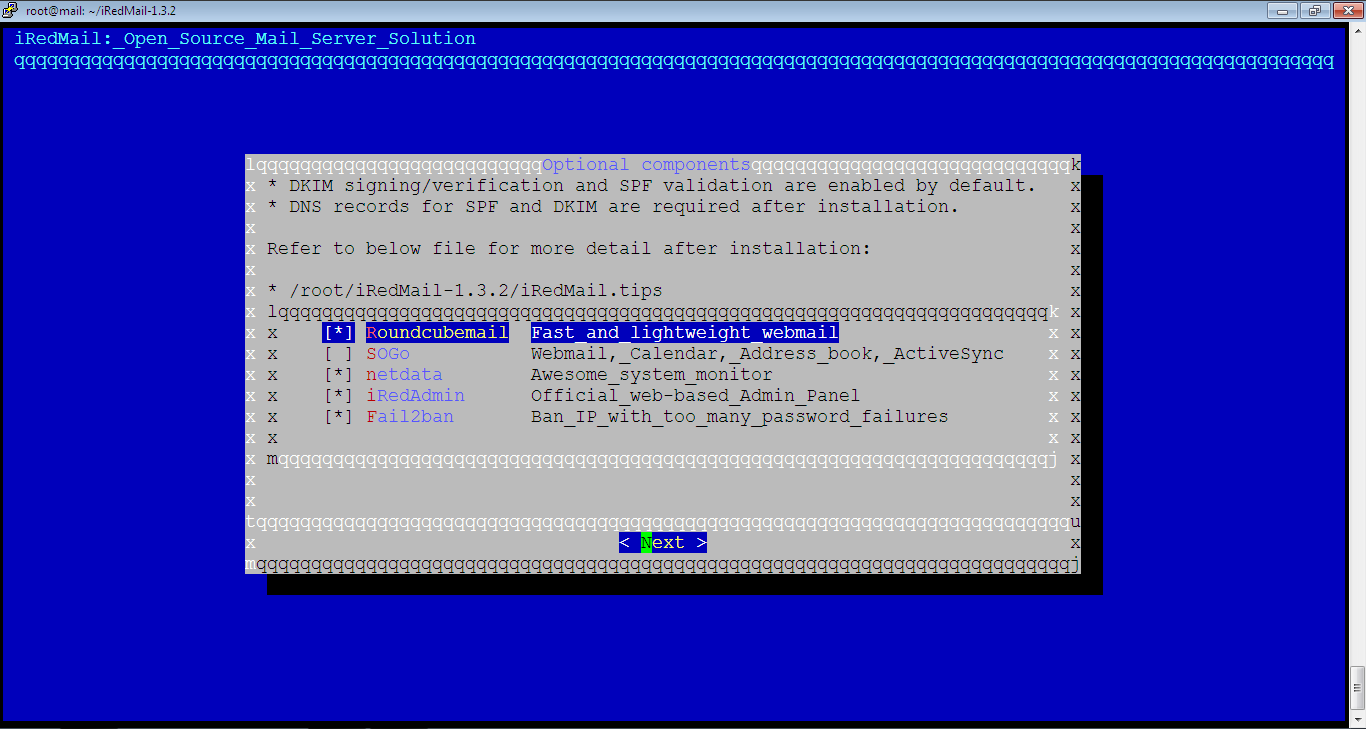
Select SOGo as we need to select all of them. Navigate between them by pressing up/down arrow keys. Select SoGO by pressing space bar key. After that, hit Enter key to proceed.
Review Your Inputs
13. It’s the time to confirm the installation. Review the inputs you entered then type: y. After that, hit Enter key. The output on screen has is not clear because we use the PuTTY for Windows. Therefore, so it seems there’s a conflict between PuTTY for Windows and iRedMail setup wizard.

If you type: N, (or: n) or in case you hit Enter key, the installation will be cancelled. So, if you run the installation (bash script) again (following step 4) as below:
root@mail:~/iRedMail-1.3.2# bash iRedMail.shiRedMail will ask you to proceed with the previously entered inputs. Type: Y, (or: y), to continue. If you want to enter new inputs, type: N, (or: n) to start the installation wizard from scratch.

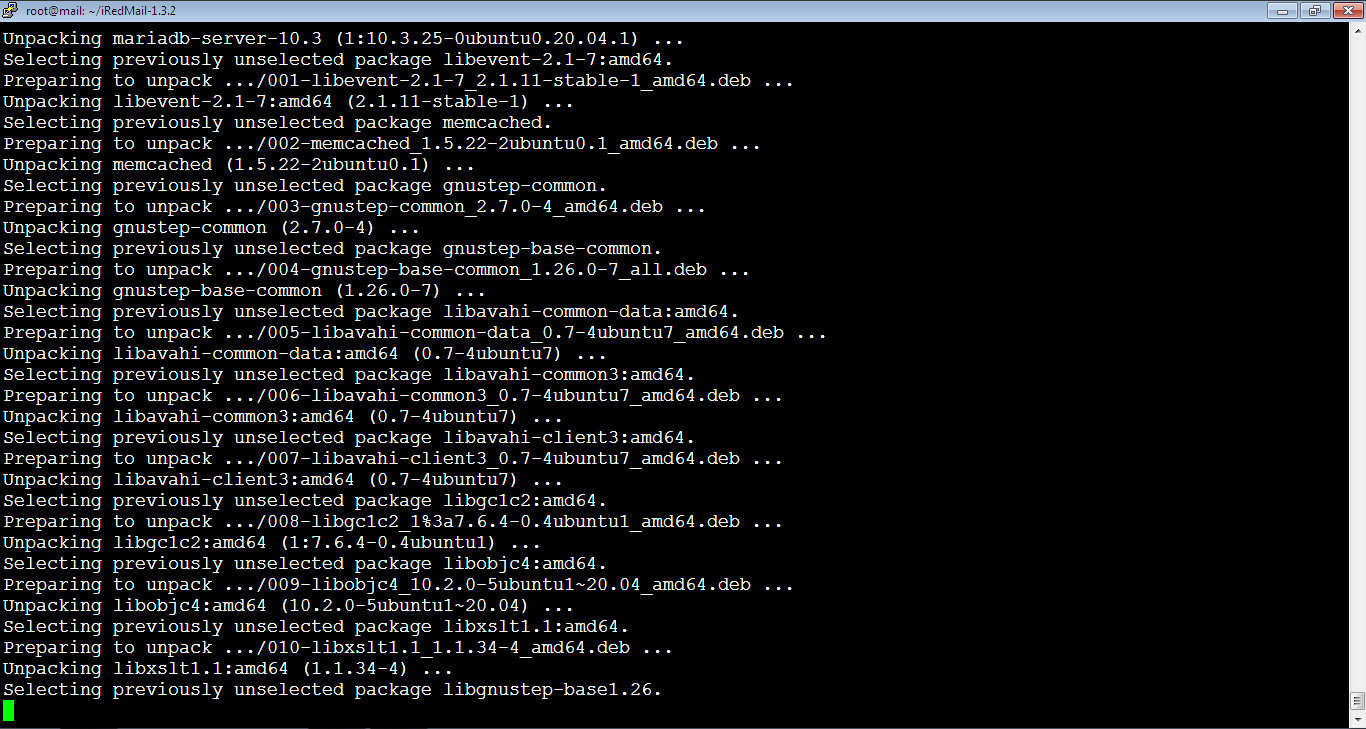
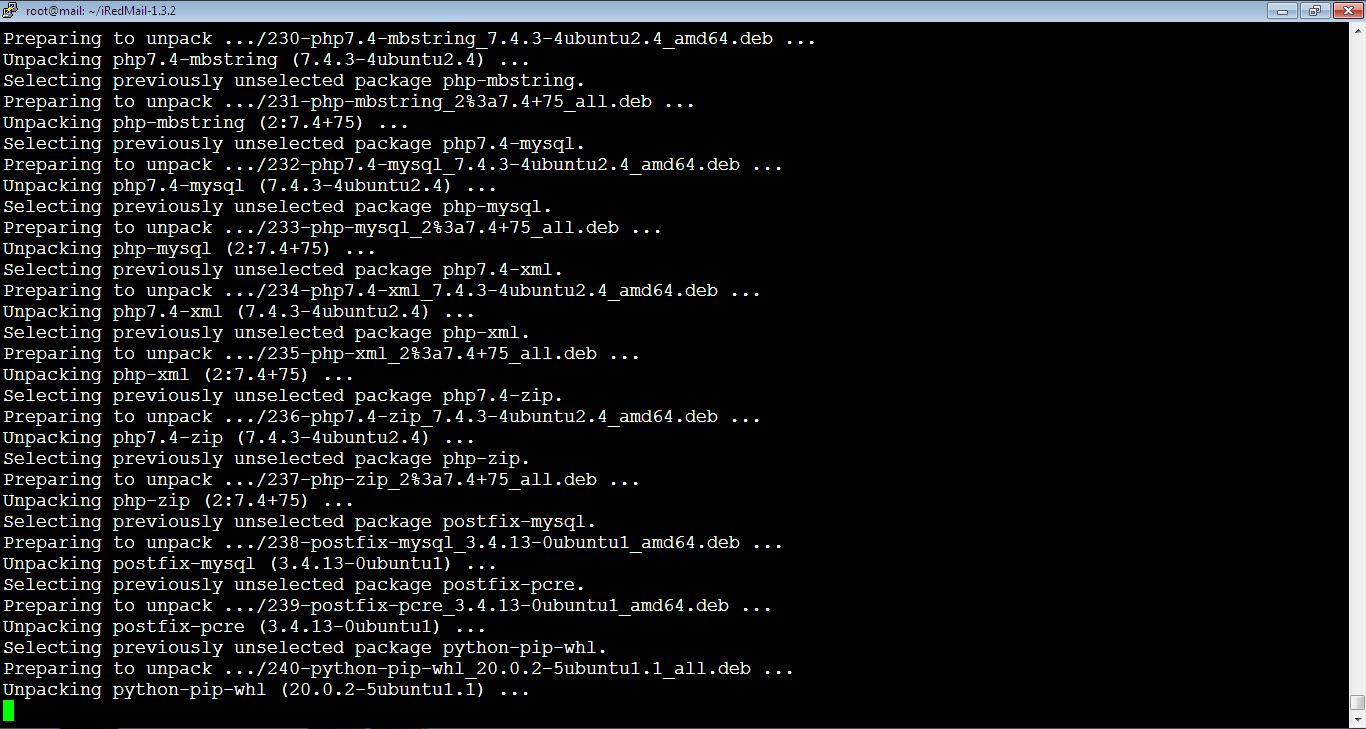
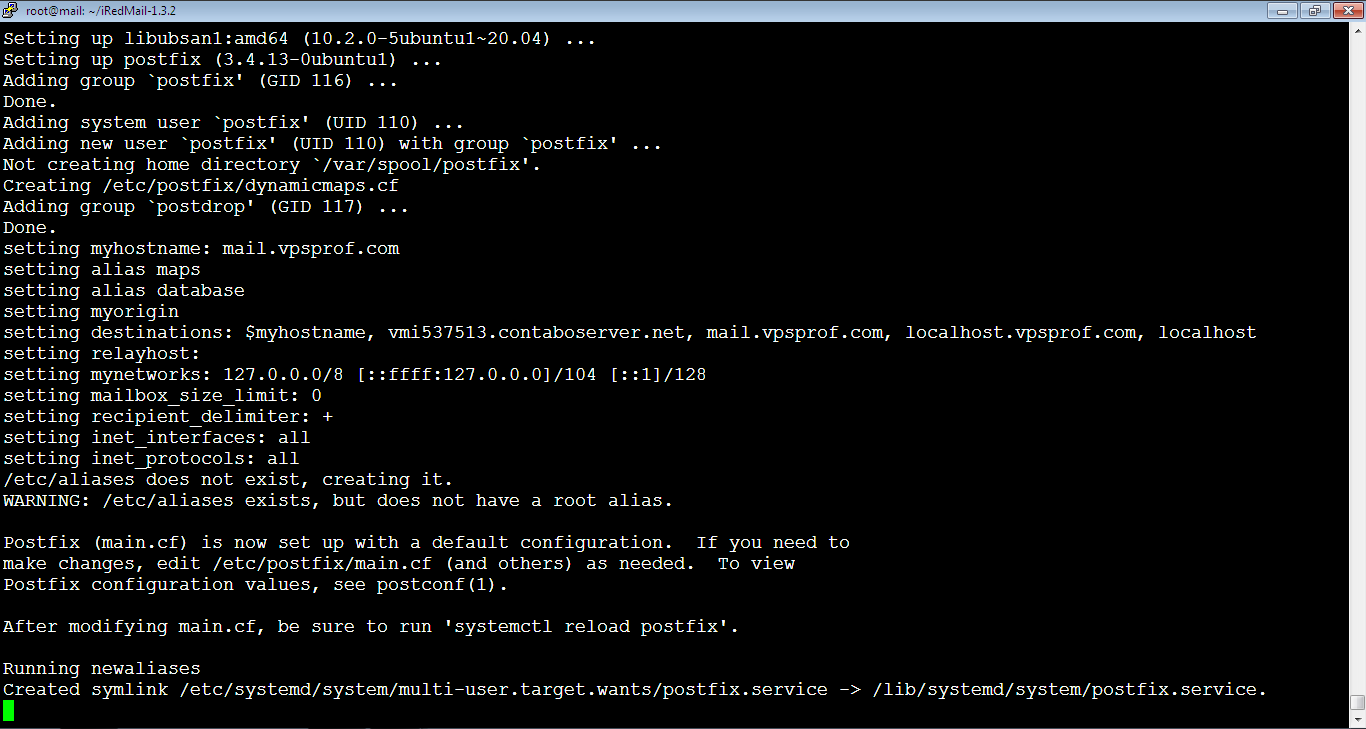
Once you confirm to proceed with the installation, you will need to be patient as iRedMail will install many packages. It will take around 10 minutes to finish the installation, the progress will be like below:

Be Patient 🙂
The below step may take around 2 to 3 minutes. Don’t think it’s frozen, be patient please:)
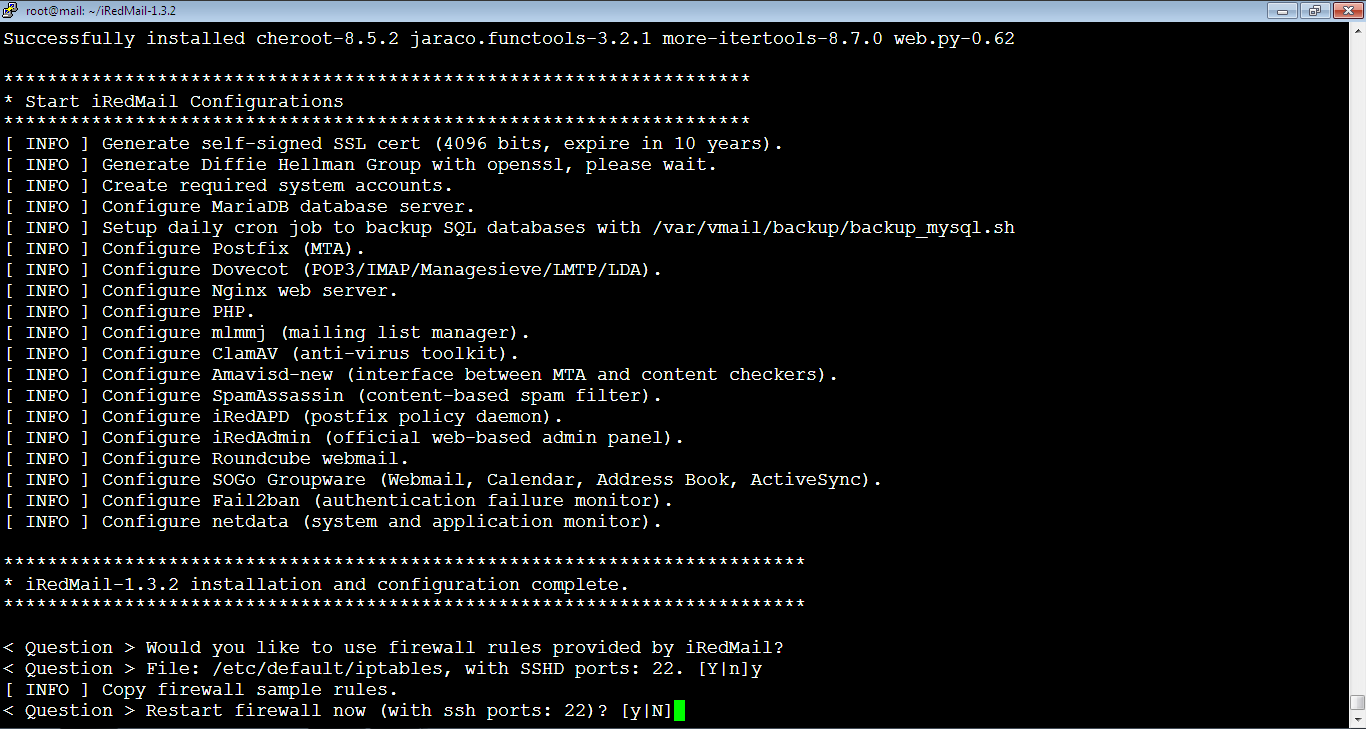
14. You should confirm if you would like to use the firewall rules provided by the iRedMail. Type: Y, (or: y), to confirm then hit Enter key.
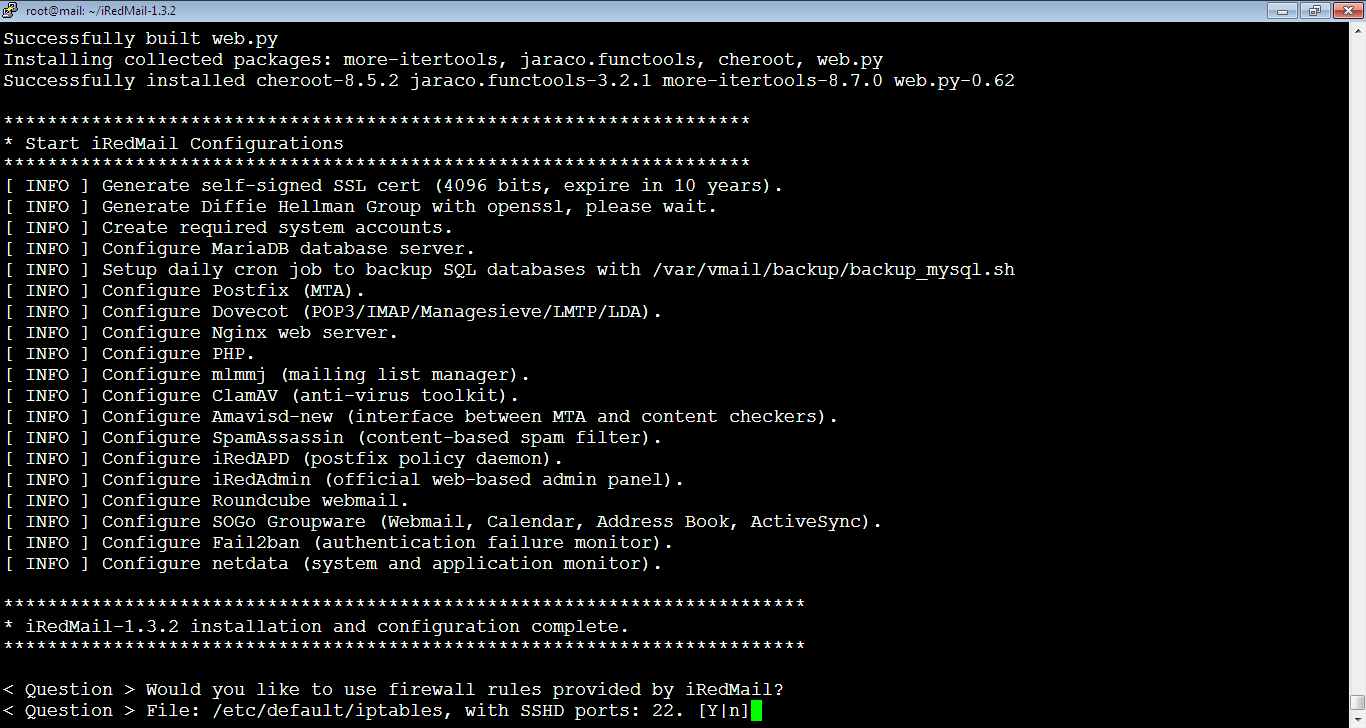
15. Let’s restart the firewall. Type: y, (or: Y), to confirm then hit Enter key.
You will get a notice that the installation has been completed successfully as below:

16. Reboot your server to enable all mail services. If you don’t reboot it, the service will not work. Run the below command.
root@mail:~/iRedMail-1.3.2# rebootAfter rebooting your server, PuTTY session will be inactive, so you need to close it and start a new one. The server will take about 1 to 3 minutes to reload. So, please wait before starting a new session. In case you don’t get connected, it means the reboot is not yet finished so wait and try after some time. Once the server is up, you can test the email server by login to Roundcube webmail and other admin panels.
The installation is complete but in the next steps, we will install TLS certificate, improve email deliverability and add extra email domains if you want.