If you lose SSH access, you will never be able to access your VPS server. So, you will need to access the console via VNC viewer or via visual interface from the hosting company.
- a. Download VNC Viewer (UltraVNC) (8 steps)
- b. Login to Server via VNC (7 steps)
a. Download VNC Viewer (UltrVNC)
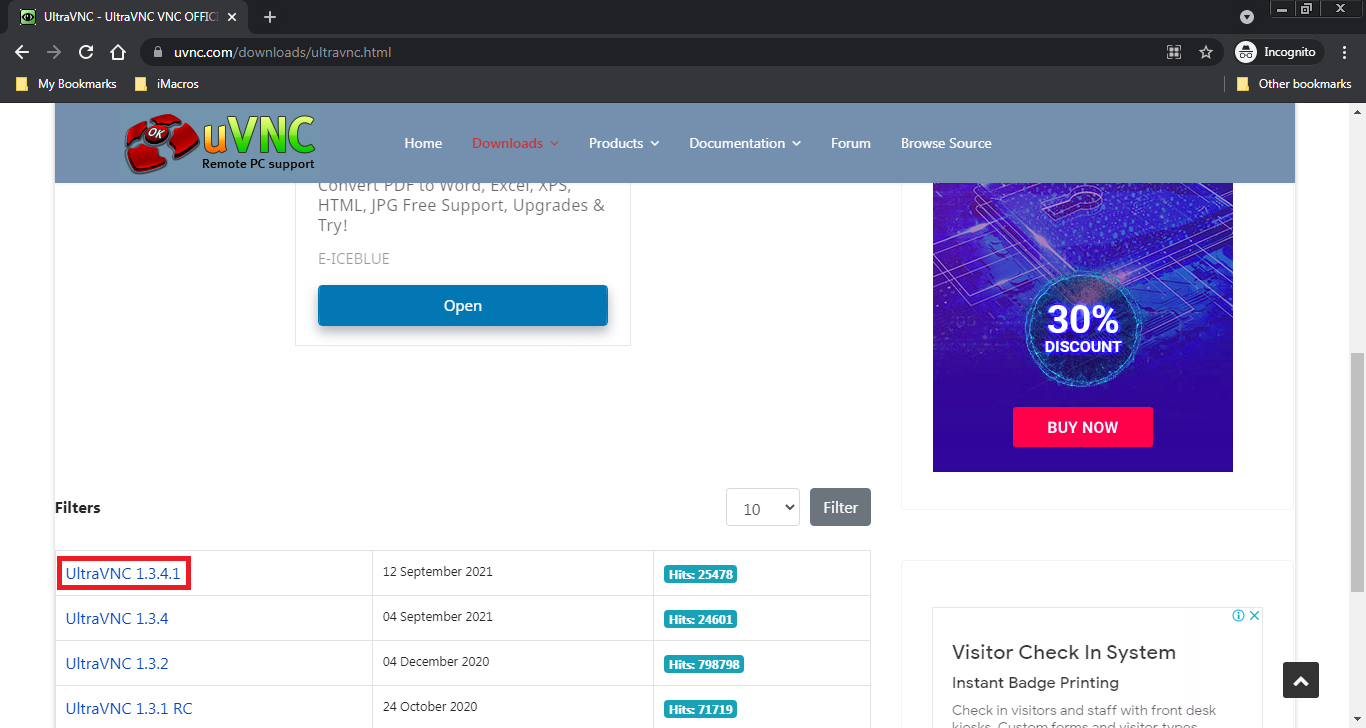
1. Download VNC Viewer client (UltraVNC) from this URL: https://www.uvnc.com/downloads/ultravnc.html. Then, click on the latest release marked below in red rectangular.
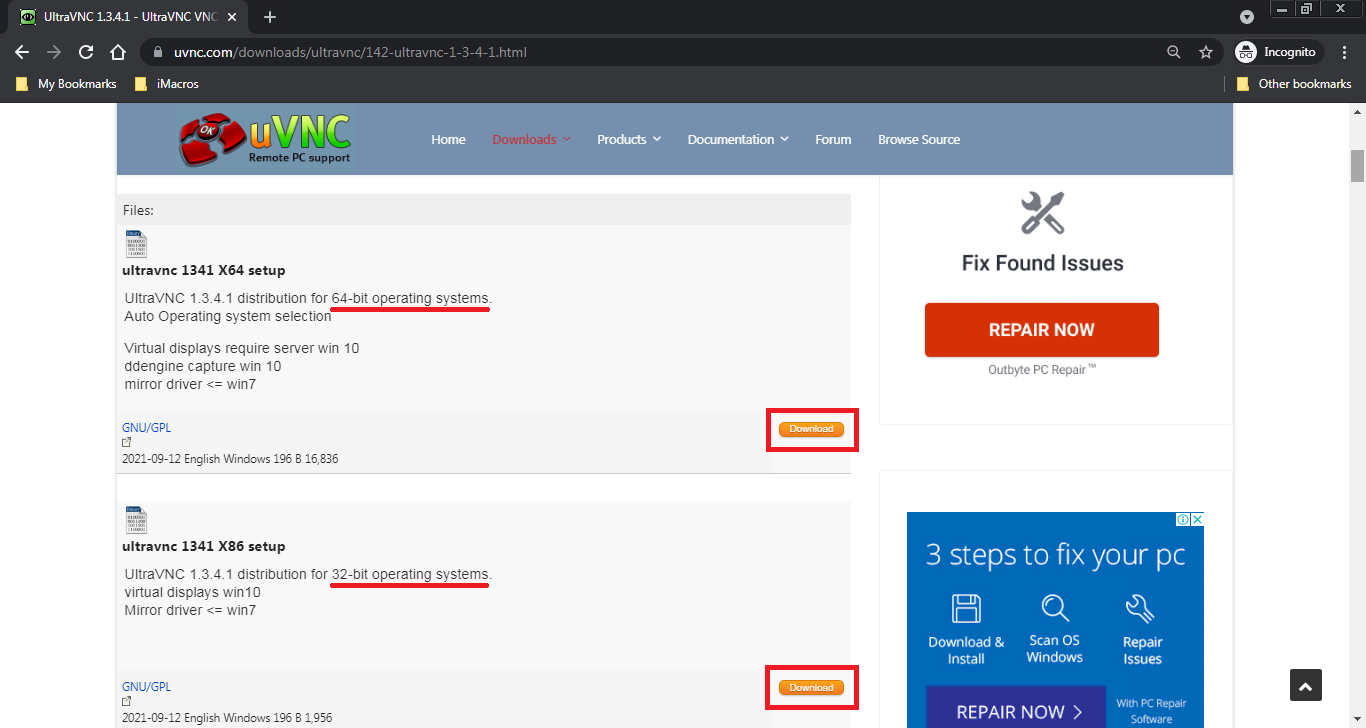
2. You will have two versions to download, for 64-bit operating system and 32-bit operating system. Therefore, you need to check your windows version (system type) by following the instructions here: Check Windows Version. After that, download the appropriate version by clicking on Download button.
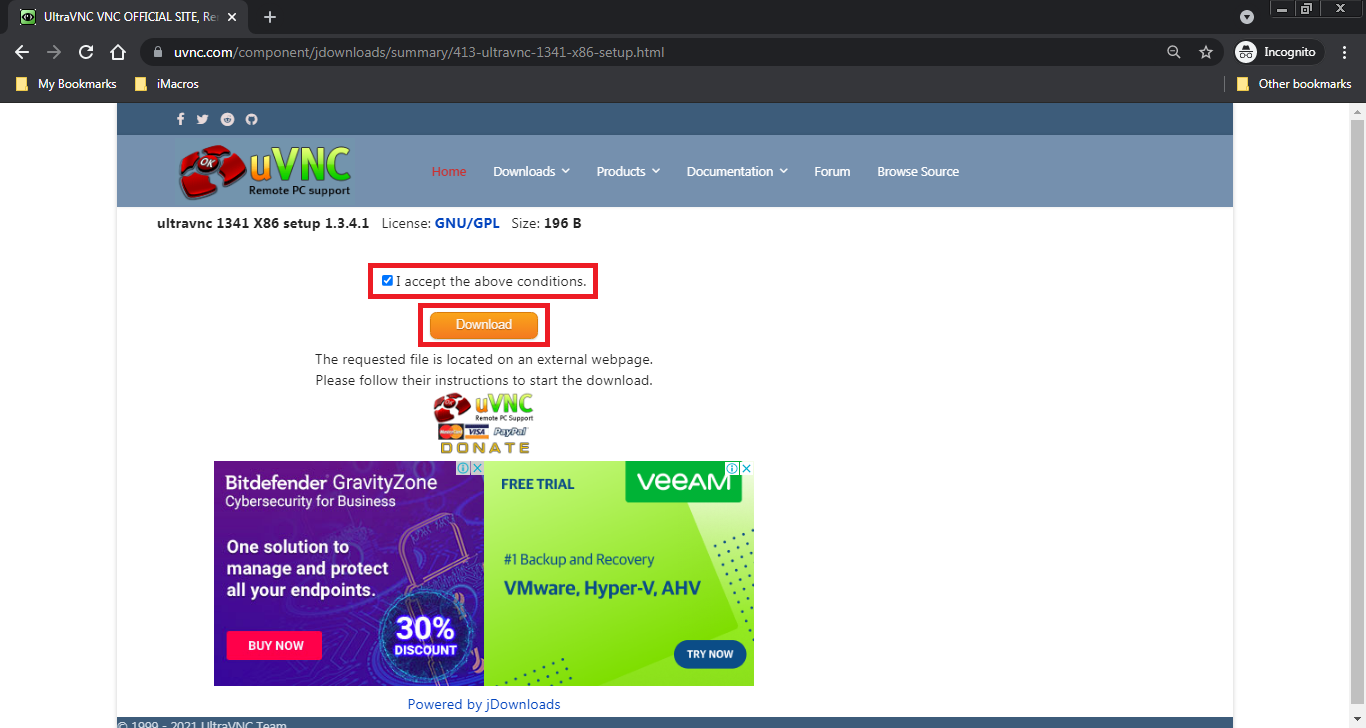
3. You will need to wait for few seconds (less than 10 seconds) until you see I accept the above conditions option, tick the checkbox. Then, click on Download button as below:
When the download is complete, the Windows will show you a warning like below, click on keep and don’t worry, it’s safe.

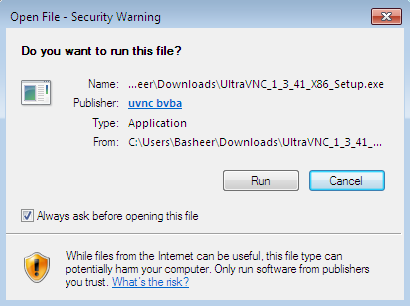
4. Open the UltraVNC_1_3_41_X86_Setup.exe downloaded file, then you may get security warning as below, click on Run:
5. Then, you will get a prompt says: Do you want to allow the following program to make changes to this computer?
Click on: Yes.
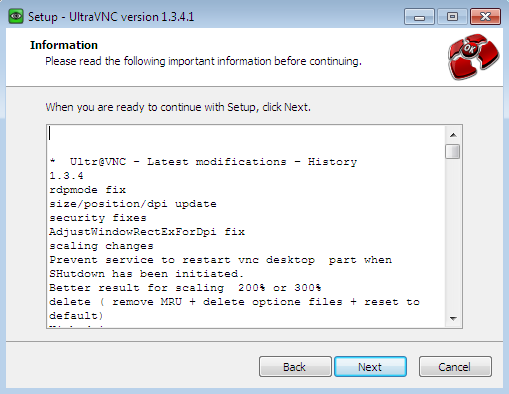
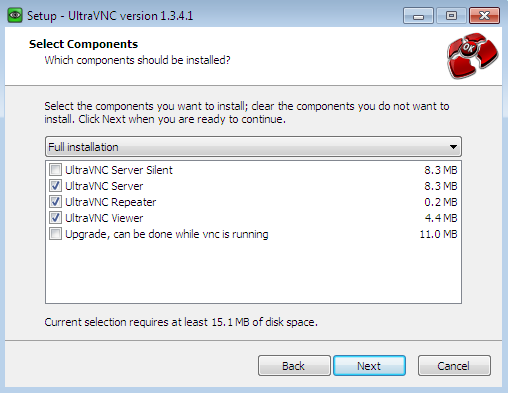
6. Follow the installation wizard, keep everything as default, click on Next.

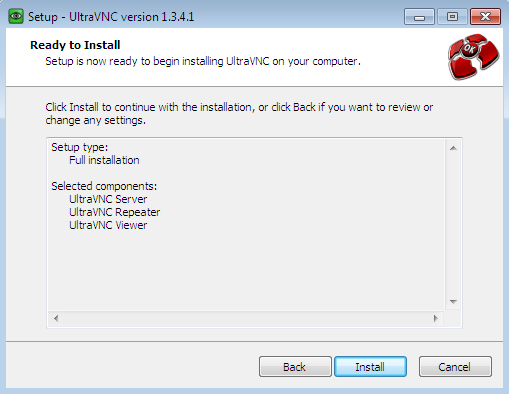
7. Now the installation is ready, click on Install.
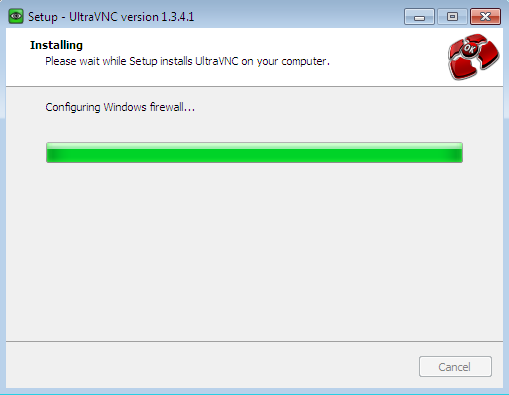
You will see the installation progress as below:
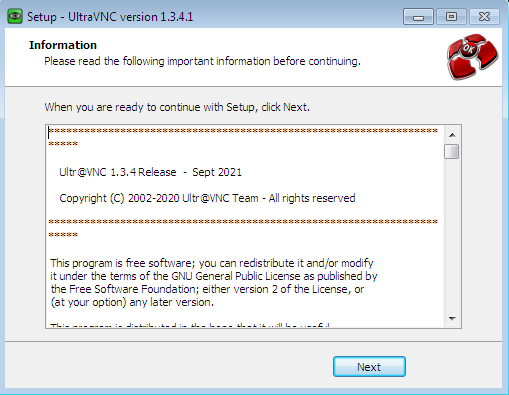
8. Here you see the copyright terms, click on Next.
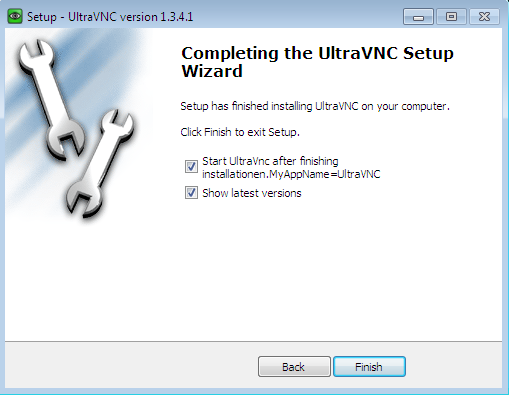
It’s done here, click on Finish.
b. Login to Server via VNC
When we login via VNC, there will be new password, new IP address and new Port number different from the real ones. We will login via VNC using Contabo server and we will get all these parameters before using them on UltraVNC software.
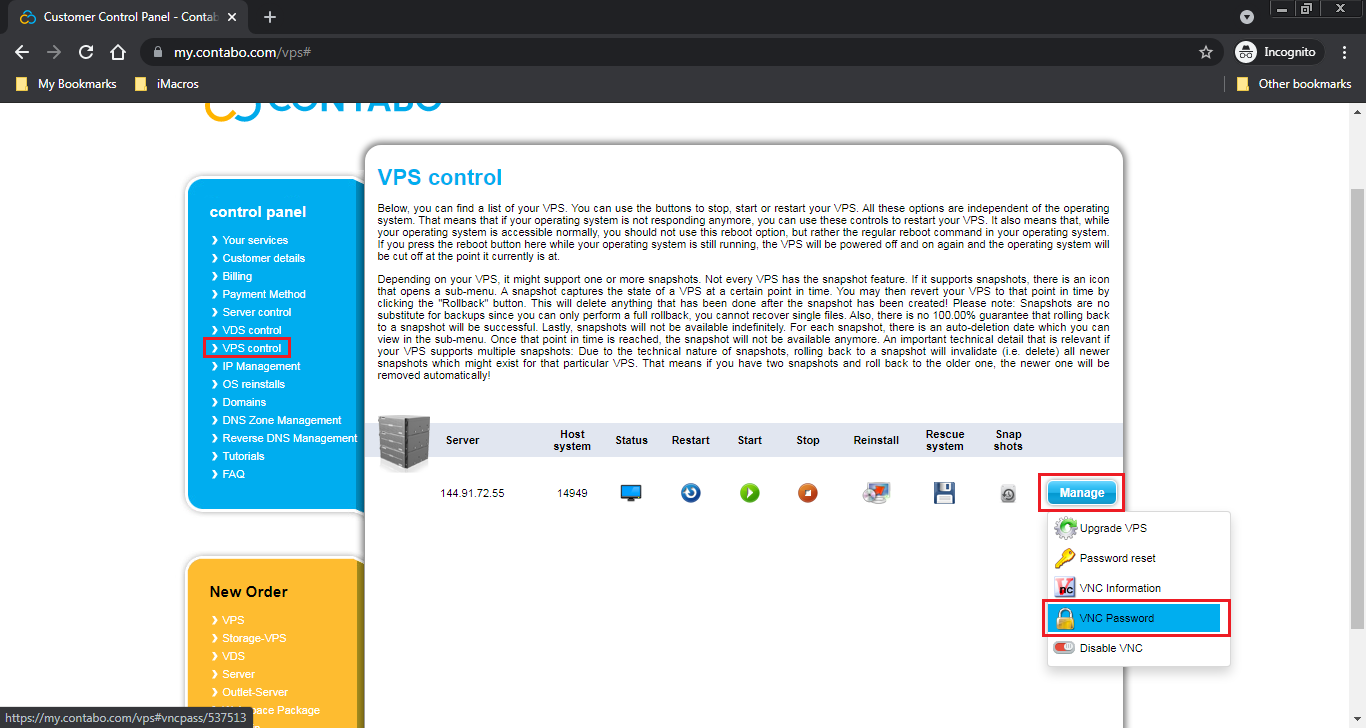
1. Let’s assign our VNC password, login to Contabo control panel by clicking here: https://my.contabo.com, then go to VPS Control, then hover over Manage, then click on VNC Password
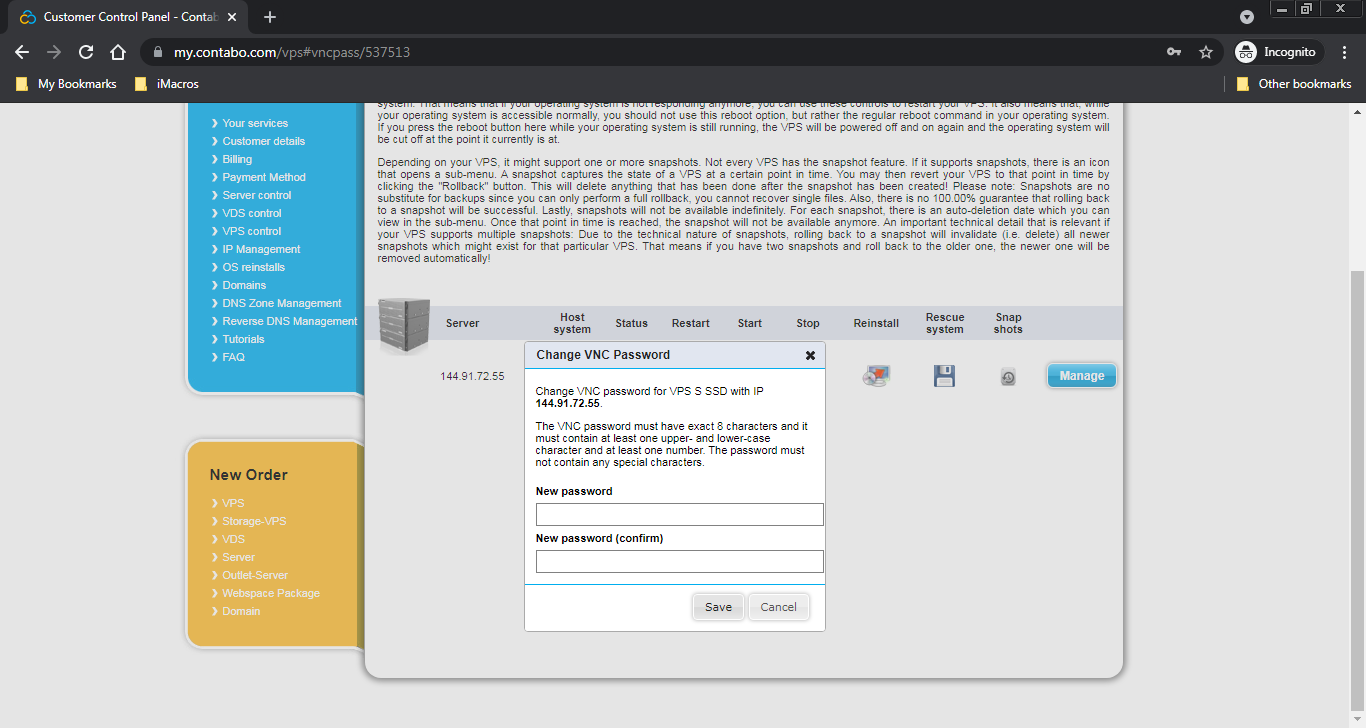
2. Add your new password, it should be exactly 8 characters at least (one upper case, one lower case and one number), then click on Save.
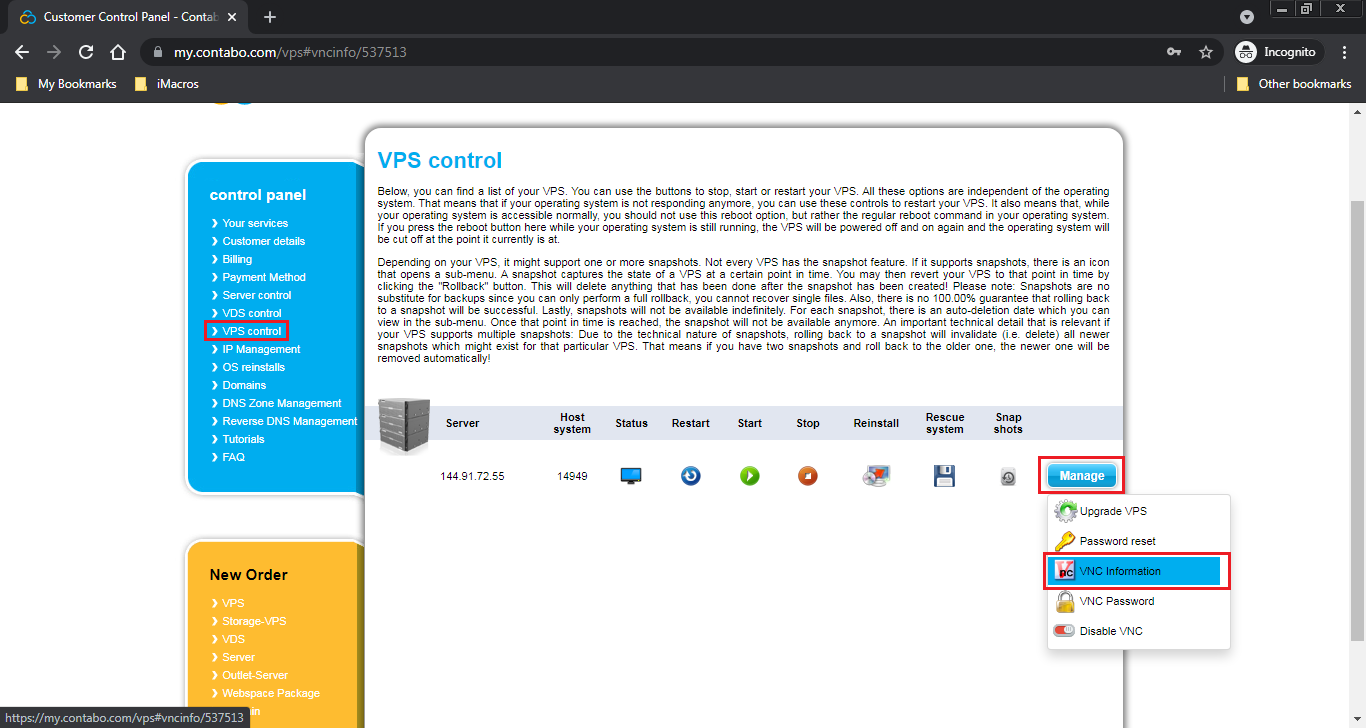
3. On the same web page, click on Manage, then VNC Information as below. Notice Disable VNC option (last option in the list), you can disable VNC access later to enhance the security on your server.
You will see the info like below:
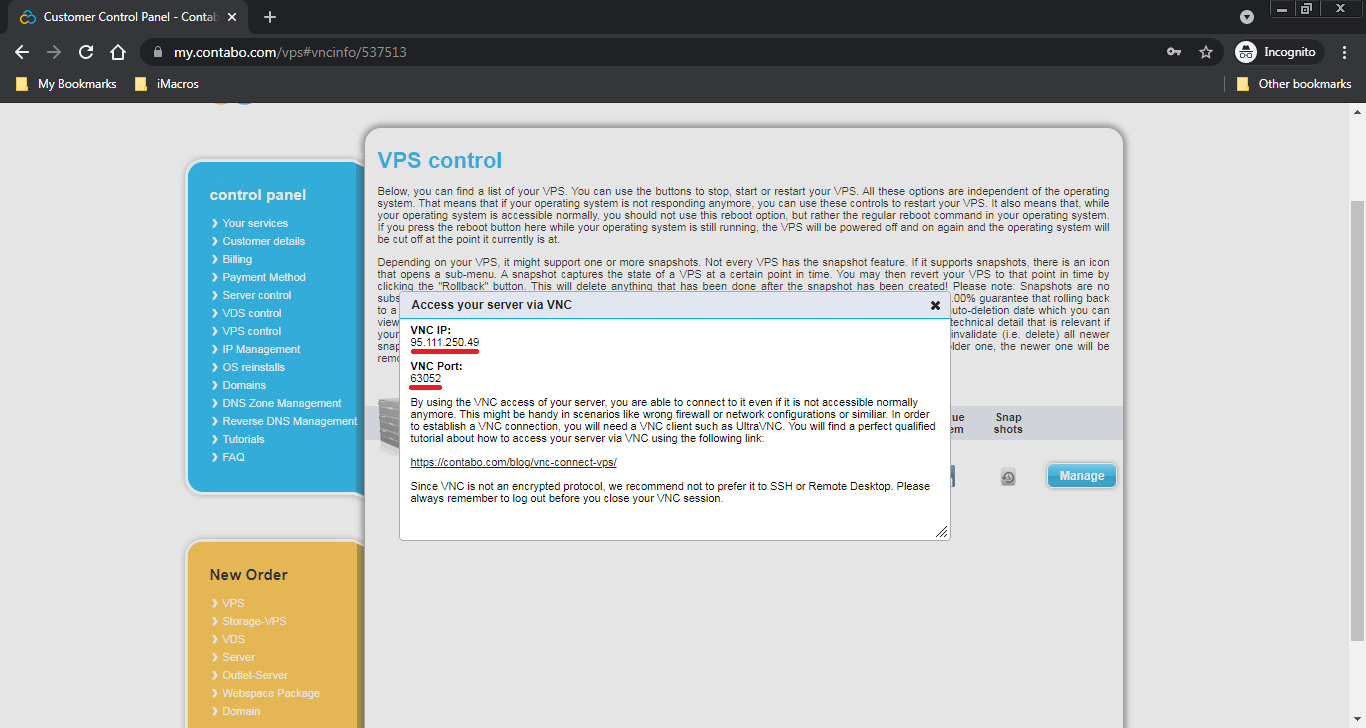
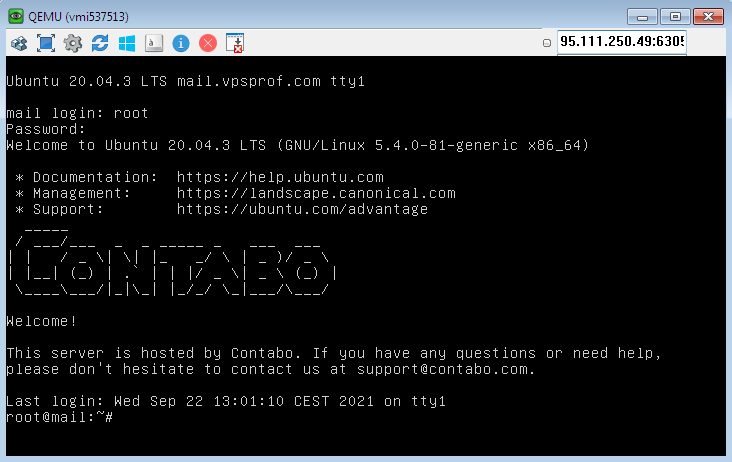
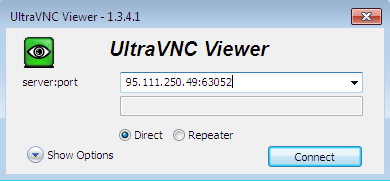
as you see, the VNC IP address is: 95.111.250.49 and the VNC Port number is: 63052, we will use them to login to server via VNC Viewer.
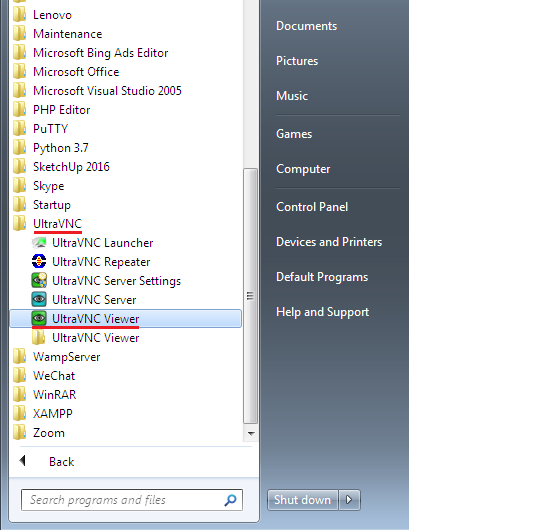
4. Go to UltraVNC program from Program Files list then click on UltraVNC Viewer as below:
5. The UltraVNC Viewer will launch and you will be asked to enter the VNC IP and the VNC Port, as you see, we entered them as below then click on Connect:
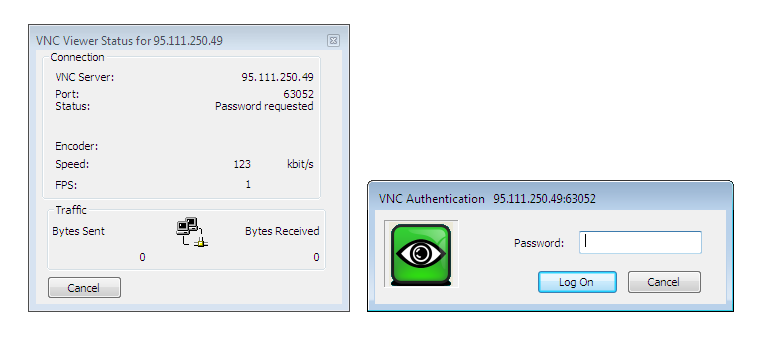
6. You will be asked to enter the VNC Password that you created earlier, enter it then click on Log On:
7. Enter your server user and password to login as usual, then hit Enter key.
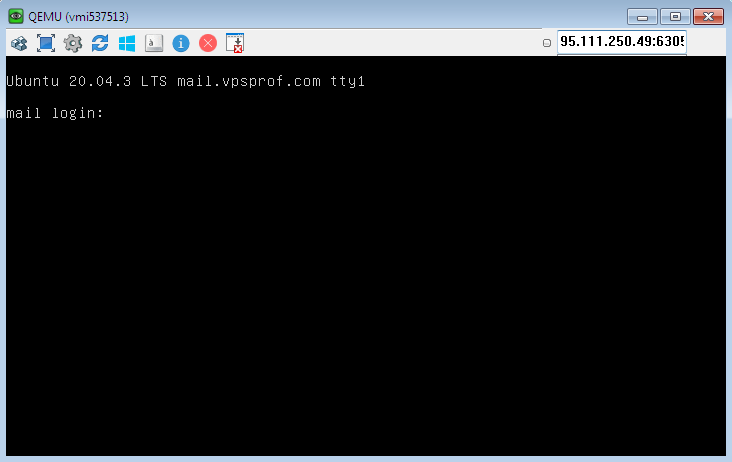
And here we go, as you see below, we’re there via VNC. You can close the session by typing exit on the console then hitting Enter key, after that click on the X button in red circle.