Every website needs unique MySQL database as well as unique MySQL database user.
- Create Database User
- Change Database User Password
- Create Empty Database
- Delete Database
- Grant Database Privileges to the User
- See All Database Users
1. The first thing to do before you create a new MySQL database is to login to MySQL (MariaDB) console by running the following command on PuTTY SSH client or any Linux terminal:
root@mail:~# mysql
Create Database User
2. Then, we need to create MySQL database user (sitebase_user) for the new website by running the below command. Let’s assume that the password is: 12345678, you should use stronger password.
MariaDB [(none)]> CREATE USER 'sitebase_user'@'localhost' IDENTIFIED BY '12345678';
Note that we pressed: Ctrl+L, to clean the MariaDB PuTTY console before creating the database user.
Change Database User Password
You can change the password of the user by running the command:
MariaDB [(none)]> ALTER USER 'sitebase_user'@'localhost' IDENTIFIED BY 'yourNewPassword';In order to delete the user you created, run the command:
MariaDB [(none)]> DROP USER 'sitebase_user'@'localhost';Create Empty Database
3. After that, create an empty database (let’s give it the name: sitebase_db) by running the command:
MariaDB [(none)]> CREATE DATABASE sitebase_db;
Delete Database
At any time, you can delete the database you created by running the command:
MariaDB [(none)]> drop database sitebase_db;Grant Database Privileges to the User
4. Now, we need to connect the database with the user. For this purpose, we will grant privileges on sitebase_db to the sitebase_user by running the command:
MariaDB [(none)]> GRANT ALL PRIVILEGES ON sitebase_db.* TO 'sitebase_user'@'localhost' WITH GRANT OPTION;
5. In order to make sure that our new database (sitebase_db) has been created successfully, run the below command:
MariaDB [(none)]> show databases;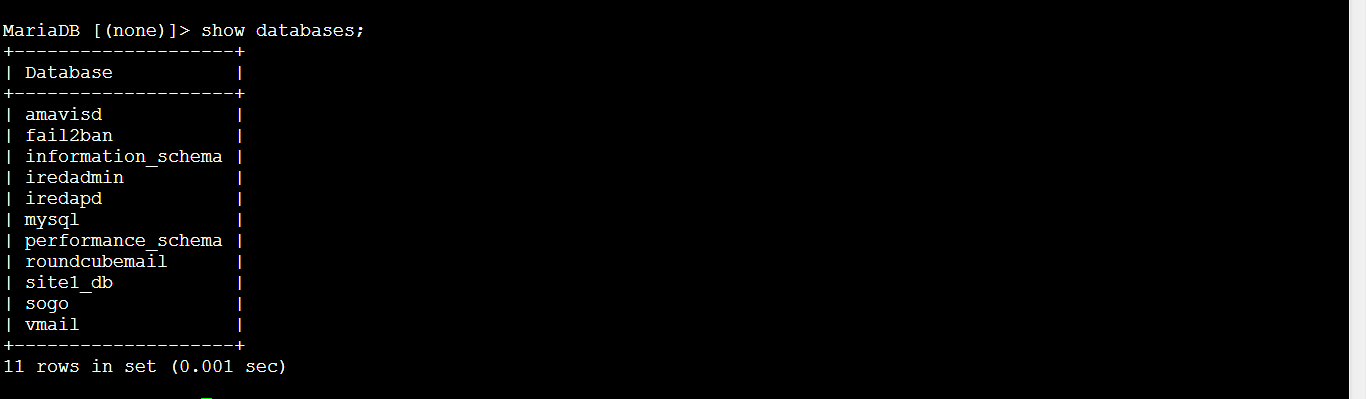
See All Database Users
To see the database user that we’ve created (sitebase_user), run the command:
MariaDB [(none)]> select user from mysql.user;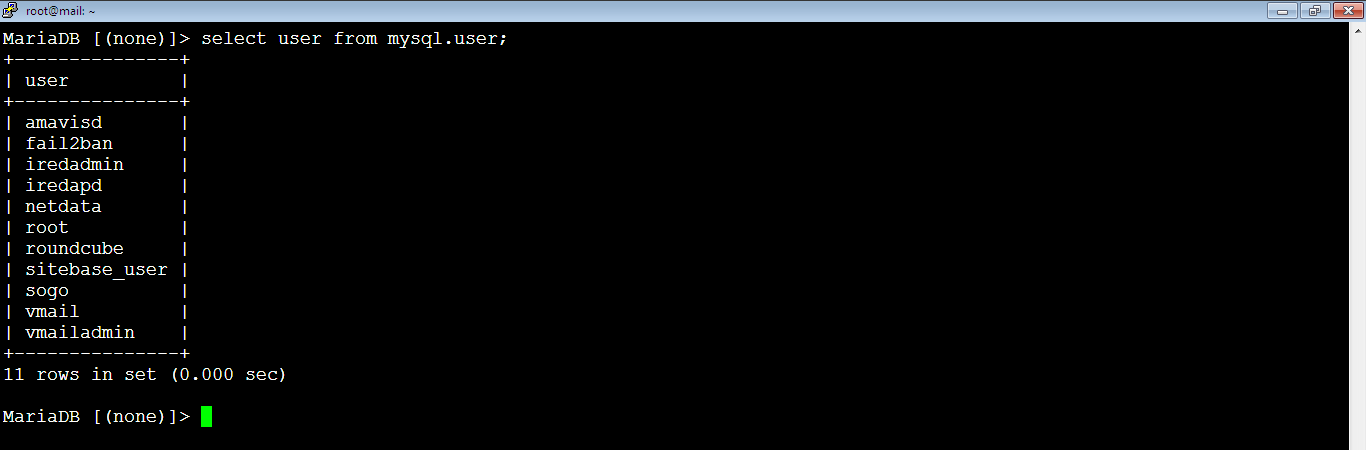
Note that we’ve the database username which is sitebase_user and the database name which is sitebase_db. Also, the password for the database username which is 12345678. We will use them all when we configure the WordPress in the next tutorial.